How to Import PDF Form Fields as Tags
In this article we’re going to go over how to import PDF form fields as tags when uploading a document into Signority.
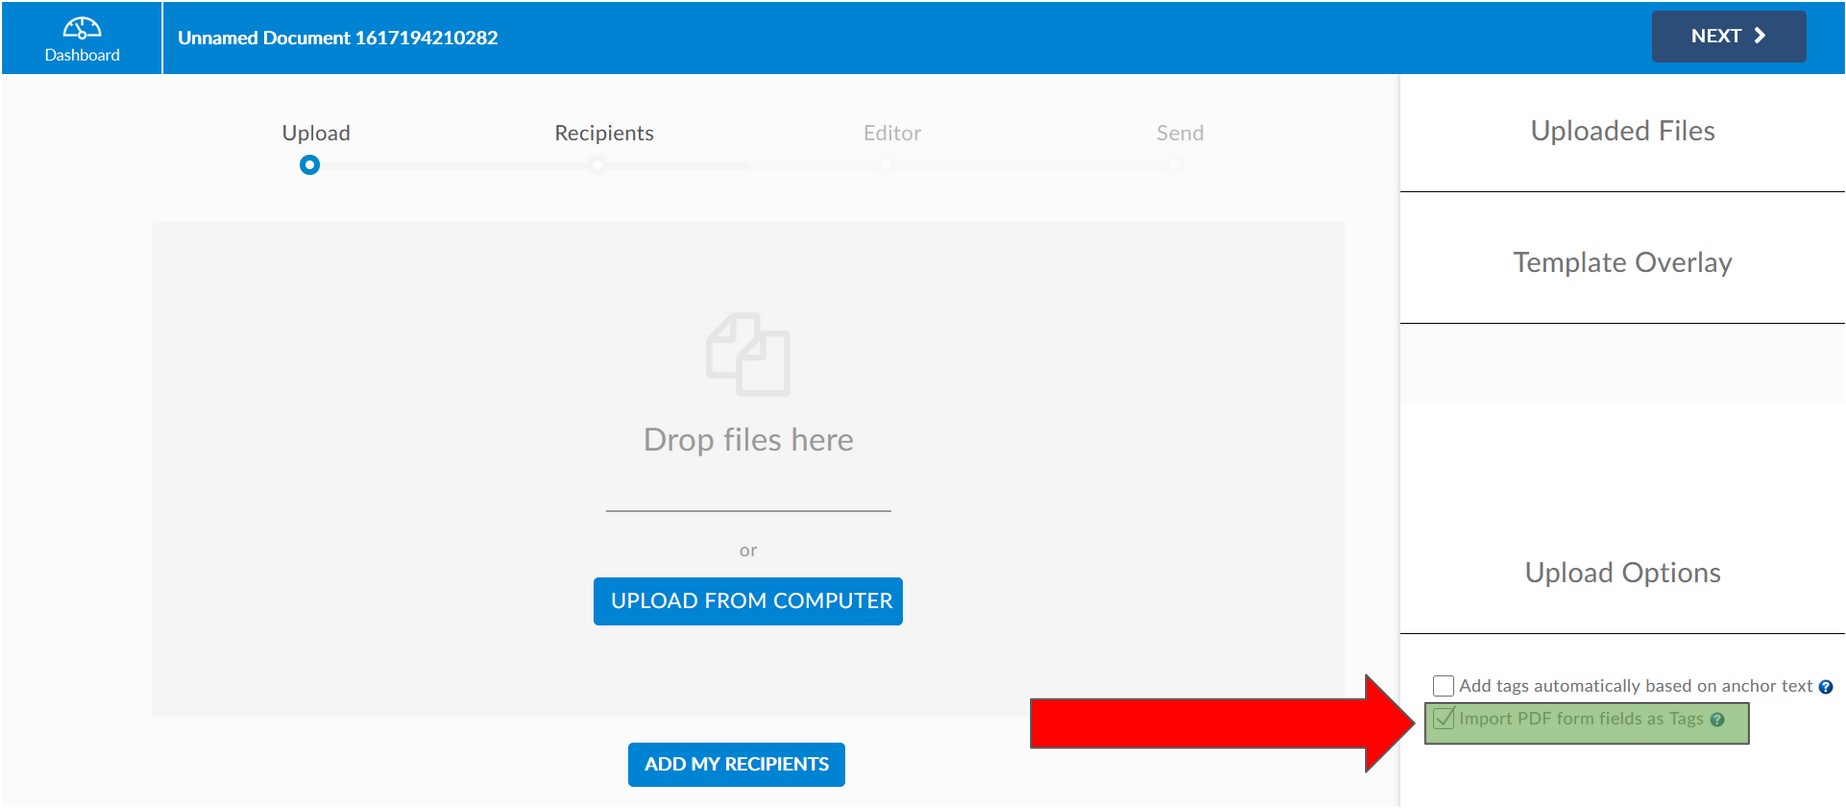
To start, log into your Signority account, and start a new document by clicking on the “+New” button and selecting “New Document”. In the page that loads up, find the option in the bottom right of the page that says “Import PDF form fields as Tags”. Make sure to check the box off before you upload your fillable PDF form.

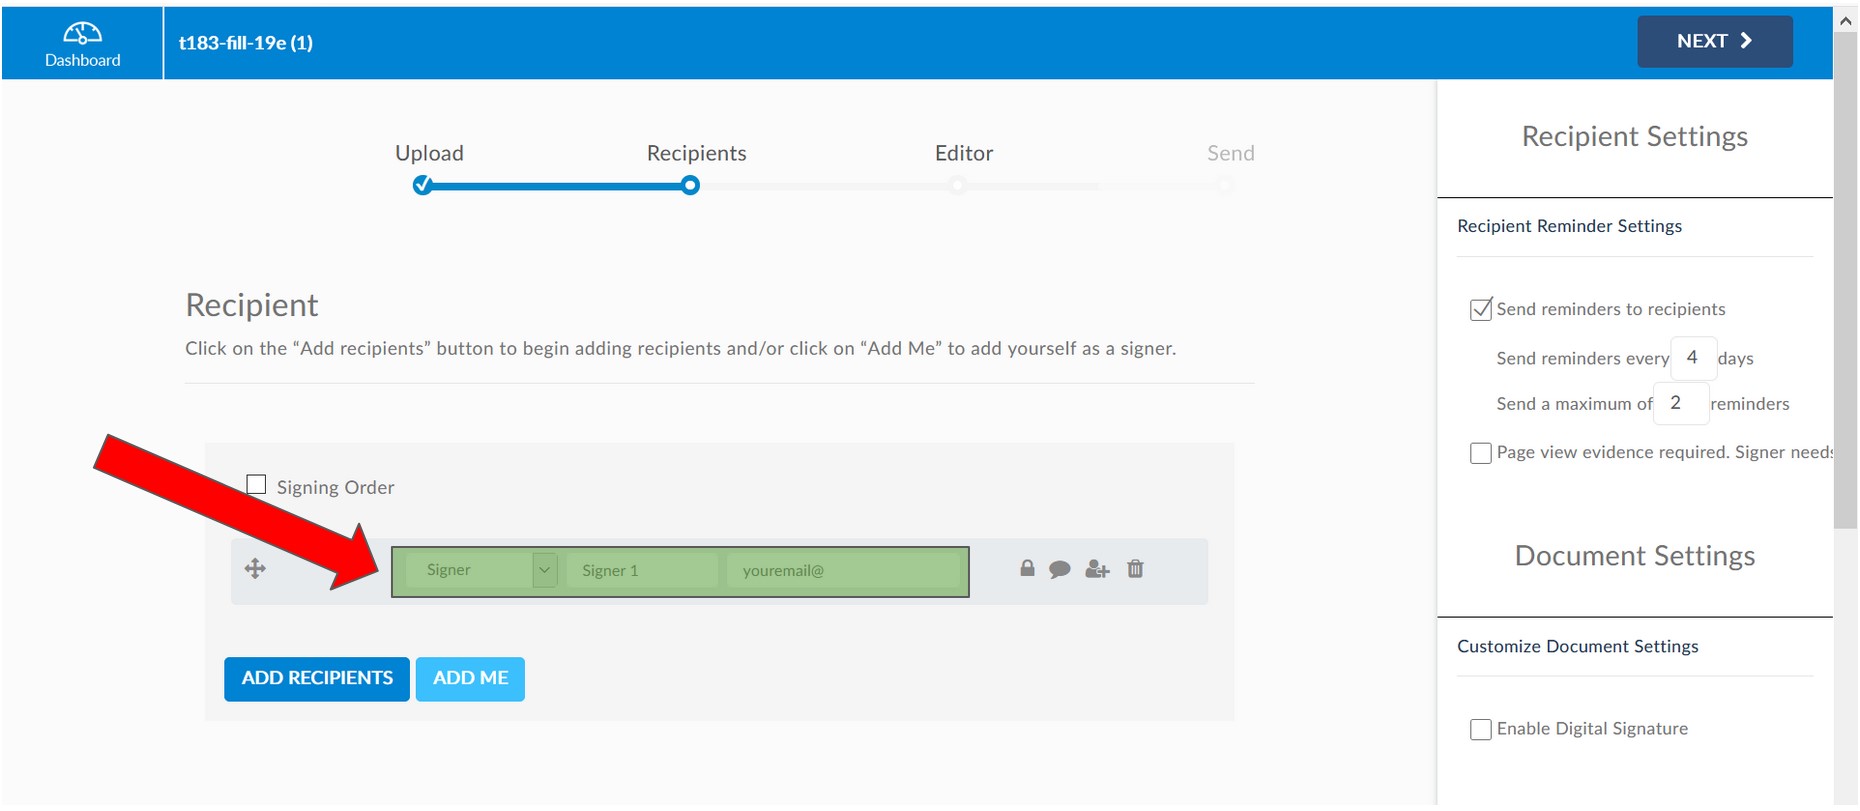
Once you’ve made sure that the checkbox has been checked off, upload your document into Signority, and hit “Next”. In the next page that appears, you will see that a recipient has been automatically generated. Make sure to edit the name and email address of the recipient and add any other recipients who may need to receive the document for signing.

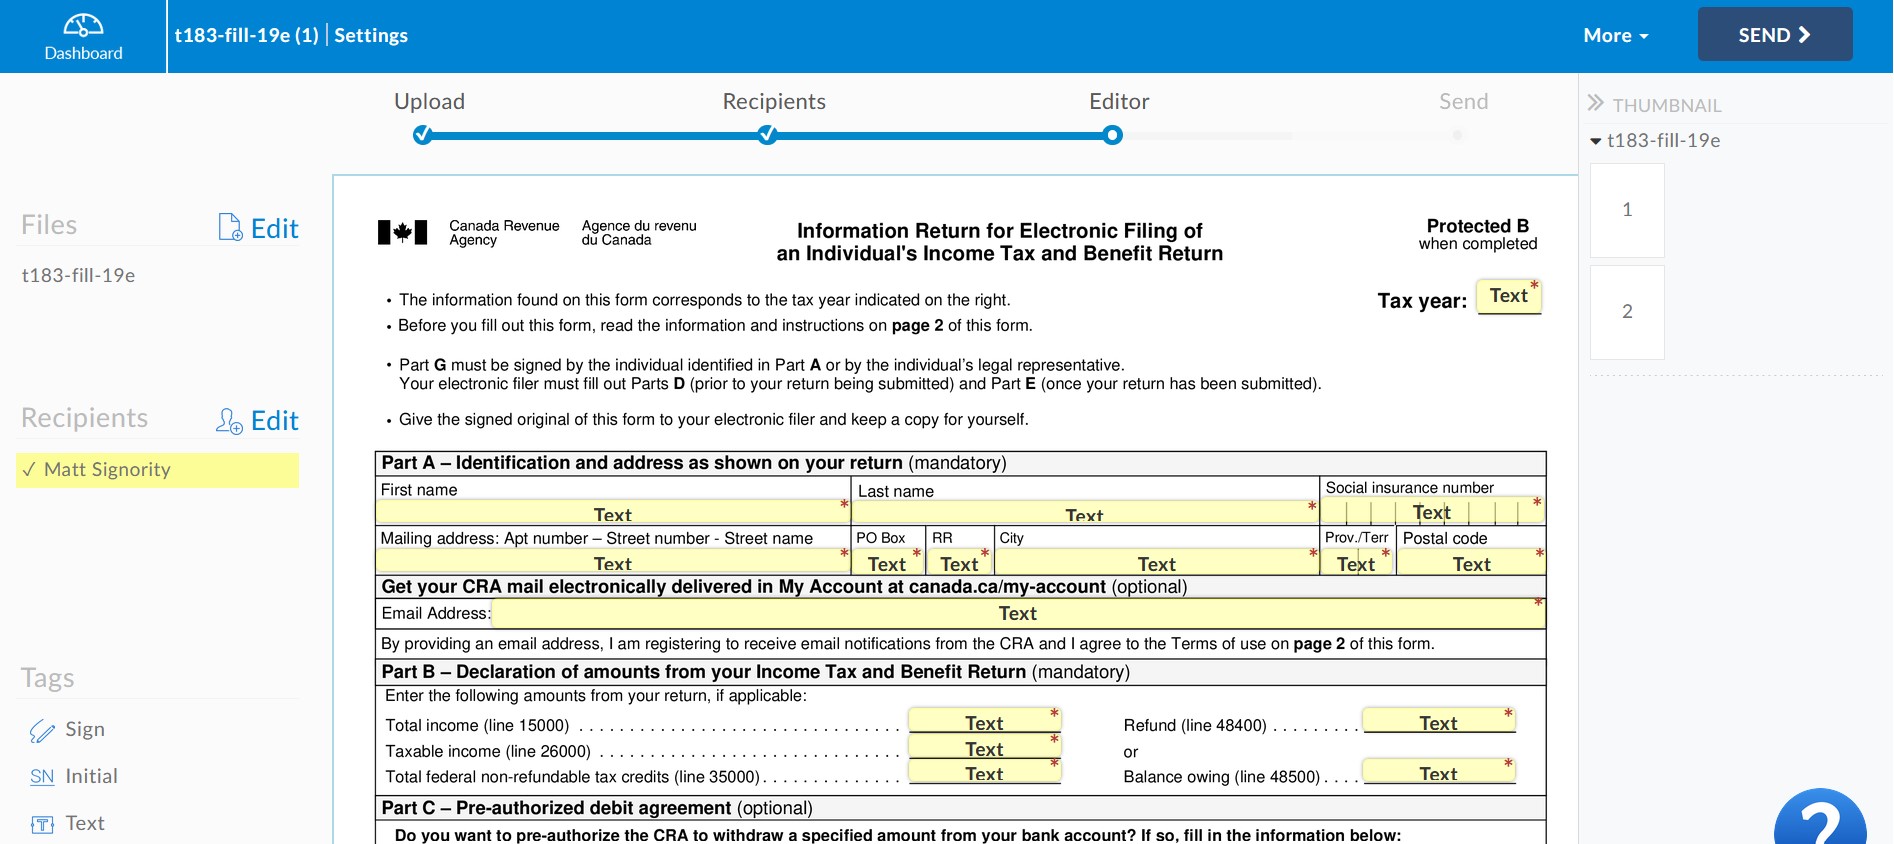
Once you have added in all the information for your recipient(s), hit “Next” to view and design your document. You should see that there are tags placed at each PDF form field. Make sure that each tag is assigned to the correct recipient, and add or remove any tags as needed, then send the document out for signing!

And that’s how you import PDF form fields as tags in Signority!
If you have any questions, you can email us at support@signority.com, or call our toll-free at 1-833-222-1088.
