Electronically Signing a Document for Yourself
Electronically signing a document for yourself is a simple and easy process with Signority. It’s similar to when you would create electronic signature documents for others, but with a few less steps to simplify the process even further. To get started, use the +New button and select the New Document option.
Step by Step to Electronically Signing Documents for Yourself
- On the Upload page, use the
 button to bring up the browser and search your computer for the document you want to electronically sign. When you’re finished, go to the Next step.
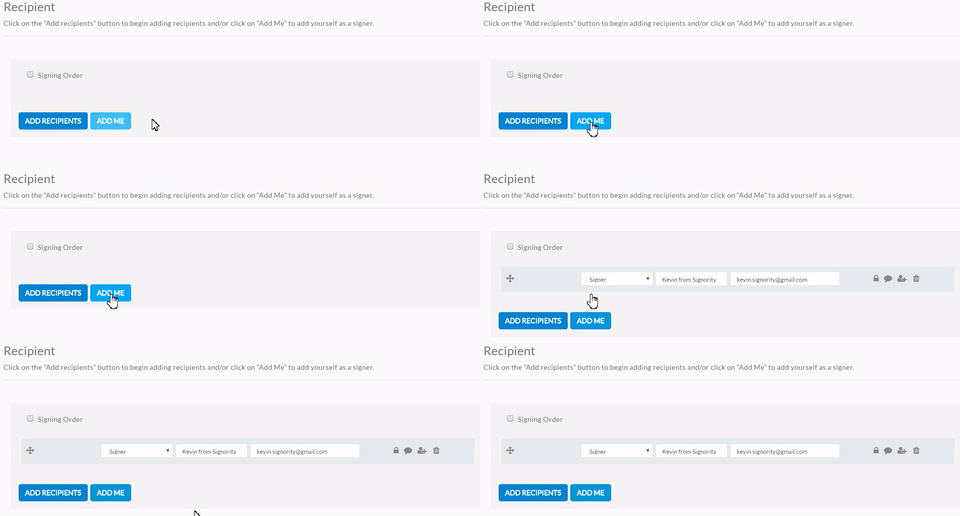
 - Once you’ve uploaded the document, you’ll need to add yourself as a signer on the Recipients page. Use the
 button to add yourself as the only signer.
- After adding yourself, disregard the rest of the Recipients page. You do not need to customize a message or set a reminder schedule because you are the only signer and you will be re-directed directly to the signing page. When you’re ready, go to the Next step.
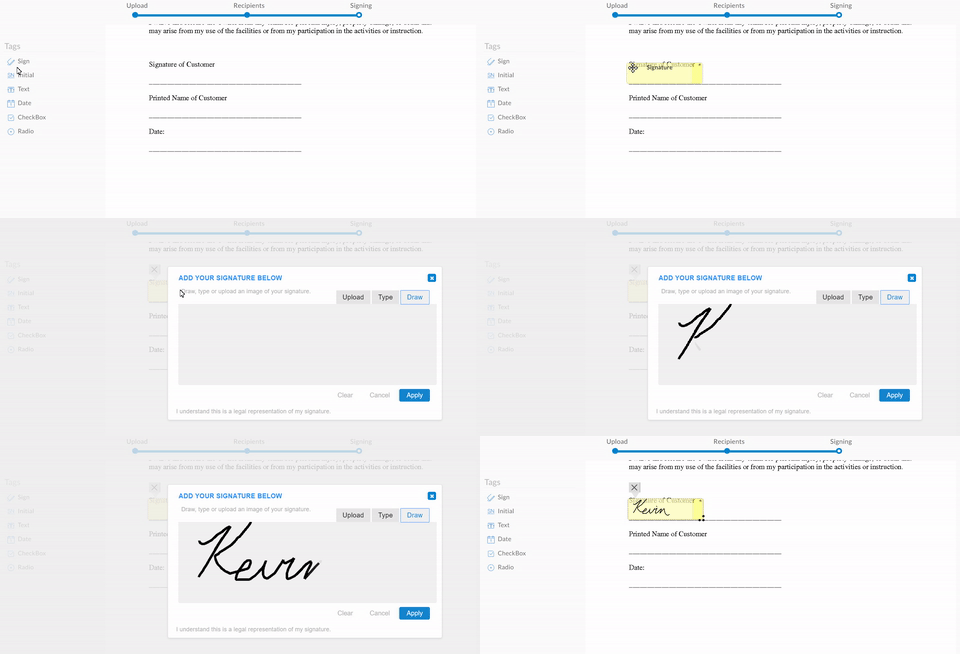
- Now, since you’re the only signer, rather than being directed to the Editor page like you normally would, you go straight to the signing page.
- Drag and drop the tags into place and fill it in immediately as you go (this is where things differ from the normal document creation workflow)
- Add the signature tag then click on it to bring up the signing box. You can draw, type, or upload your signature. Once you’ve added all the tags and have filled them in, click on Finished in the top right and the document will be finalized.

You will receive an email with the final copy or you can download it directly from your Documents page.
And voilà! Electronically signing a document for yourself is a simple process with Signority’s easy-to-use eSignature solution!
Need other signatures? Check out our help page on creating electronic signature documents for others here.
Further Readings
Creating and Using Templates for Electronic Signature Documents
Creating Your Default Signature Design for One-Touch Signing
Overview of Tags


