Using Page View Evidence for Sensitive Documents
There can be a wide variety of documents that require signatures. Sometimes, those documents require signers to agree and understand the full content and terms of the contract. In these instances, it’s often common practice to require an initial on each page to confirm the signer has read and reviewed the page. With Signority, these documents can be simplified even further with the Page View Evidence feature.
This feature adds a checkbox to the bottom of every page that signers will have to mark off in order complete the document. This information then gets captured in the document history and helps prevent any issues regarding accepting the terms of the documents.
Using Page View Evidence
Page View Evidence can be turned on for specific documents while you’re creating a document for eSignature. To get started, create a New Document using the +New button in the Dashboard.
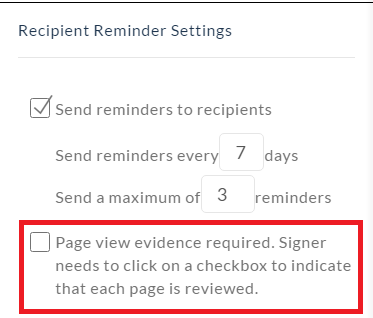
Upload the document you want to use and continue to the Recipient page. In the Recipient page, add your signers and edit the invitation email content if necessary. When you’re setting the Recipient Settings in the right-hand column, the Page View Evidence required option should be visible there. Check it to turn the feature on for the document.

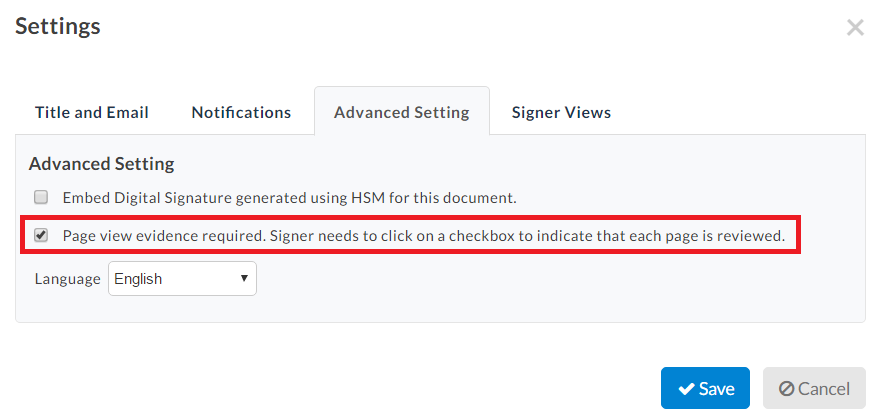
Continue to the Editor page to add your Tags. You will also have another opportunity to turn on Page View Evidence. Go to the Settings next to the Document Title. In the Advanced Settings tab, you’ll see the Page View Evidence Required option. Turn it on if you didn’t do it on the Recipient page.

When you’re finished adding all the tags, click Next to send the document off for signature.
Capturing Page View Evidence Information
For the signers, page view evidence is very simple. The process for signing online documents is the same for all signers. The only difference is that while you’re signing, you’ll be prompted for a checkmark with the text “I have read the current page“. Once you’ve checked the box, it won’t be accessible to you anymore. Continue through the document and Submit when you’re finished.
![]()
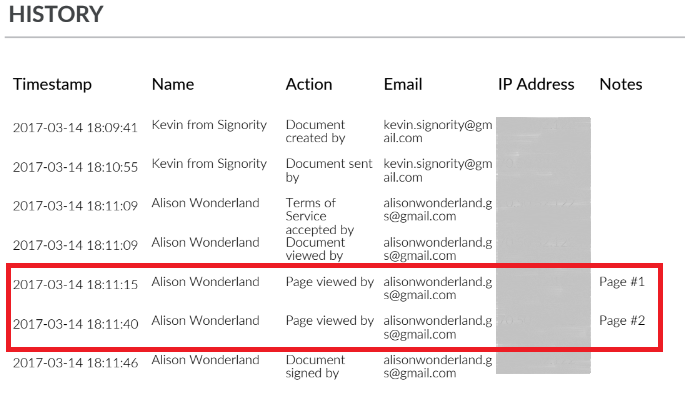
This information will then be captured in the document history. While you’re monitoring your document status and history, you’ll be able to see which pages they’ve read and reviewed. The information will also be shown in the audit trail in the finalized document.

That’s all there is to page view evidence. It’s a simple feature but can be very useful depending on your document!
Further Readings
The Anatomy of an Audit Trail
Setting Your Default Automatic Reminder and Notification Settings
Track and Monitor Document Status & Workflow
