Signature Workflow Example
To prepare a document for signature, a document must be first created and uploaded to the Signority cloud service and meta-data (e.g. Signers and Signature boxes) must be added to the uploaded document. Then the document can be sent out for signature.
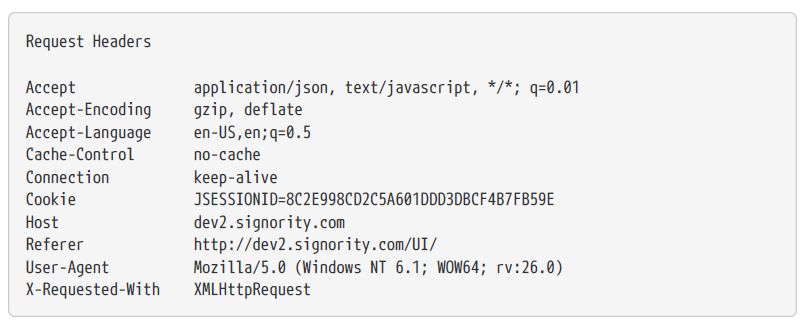
To prepare a document for signature, a user must first be authenticated to Signority. The user is the document owner of the to-be-signed document. To register a new user, you can go to: https://sign.signority.com/UI/. To login, call the login API “POST /user/login” API with username and password. If authentication is successful, the API will return “{success: true}”, a session cookie will be returned from the server in the HTTP response header, this session cookie MUST be resent in the request headers of the rest of the API calls to maintain your authentication status.
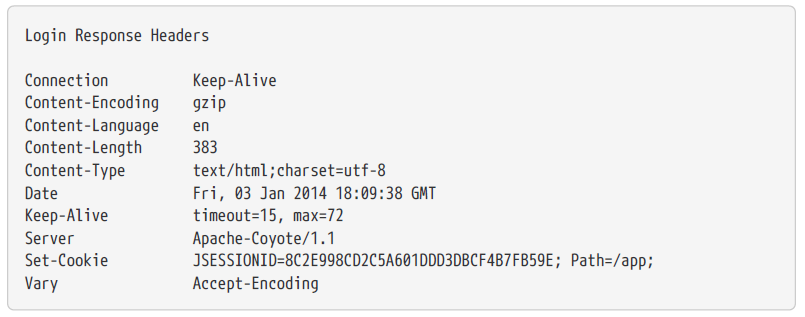
In the following API calls, the session cookie (JESSIONID) must be resent in the request headers:

A modifiable title can be added to a document along with any associated files and its meta-data in a simple single step process. The title of a document will be used to identify the document and will be viewed by the signers/viewers when actions are required. Therefore it is recommended to give the document a meaningful title. Additionally, if a different sender name or sender email is required, it can also be supplied during the document creation to set the sender information.

If the document is created successfully, the API should return document details of the newly created document including the id and title, along with the success flag in the response. Keep the id of the returned document, you will need this id in the following API calls.
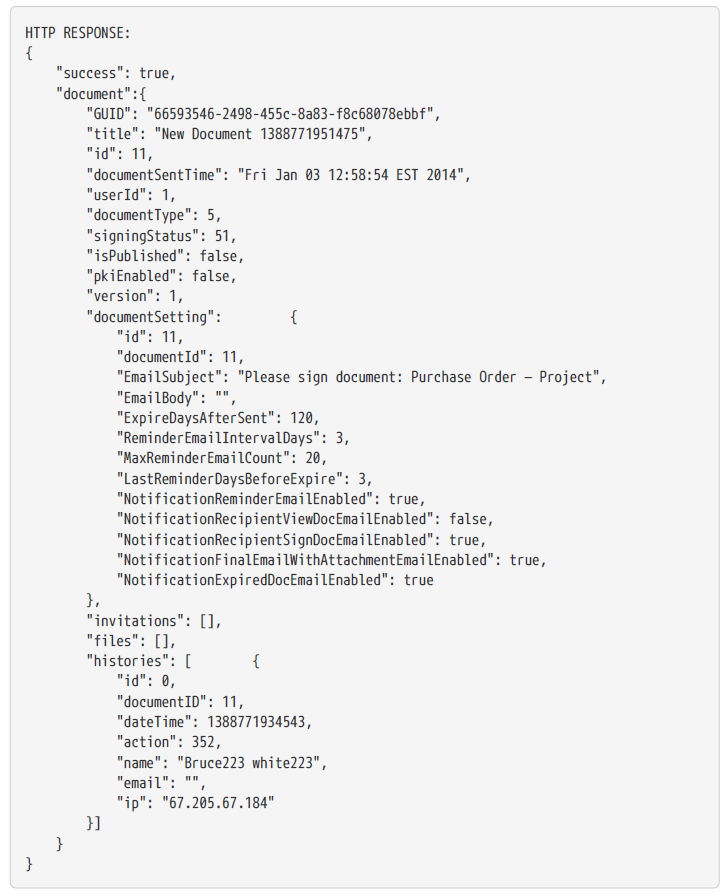
After the document is created successfully in the previous step, the id of the document is returned (which is 11 in the example above). You will need this id to add signers and/or viewers to the document. This operation is done by calling the “PUT /documents/{id}/invitations” API. An array of signature invitations is specified – a signature invitation includes the recipient’s name and email along with other signing flow info such as signing sequence and authentication methods. The mandatory fields for an invitation includes the recipient’s name, email, action (signer/viewer) and signing sequence.
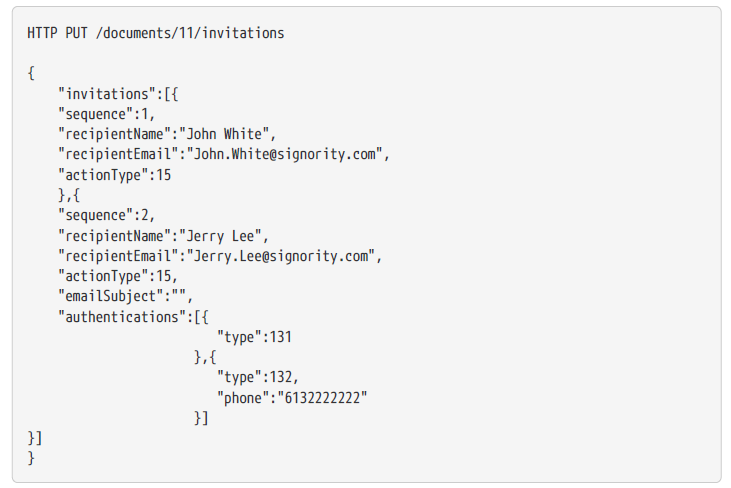
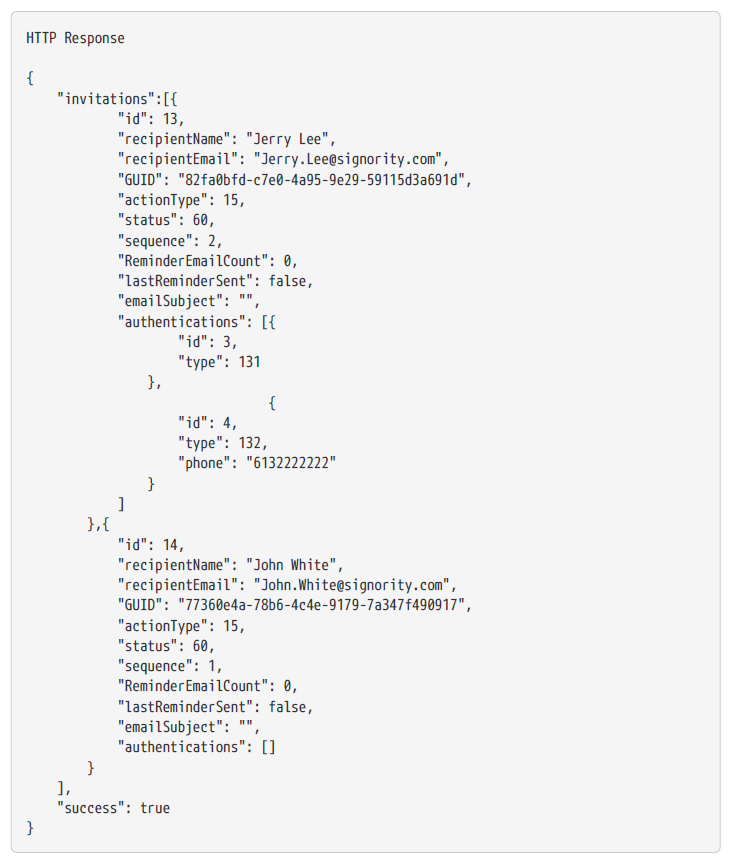
The above example added 2 invitations to the document created in the previous step. The first invitation contains minimal mandatory fields, whereas the second invitation contains customized email subject (for email invitation), authentication methods (email and SMS). The authentication type codes can be found in the Signority Codes Reference Table. If the invitations are added to the document successfully, the API should return the success flag with invitation GUIDs.
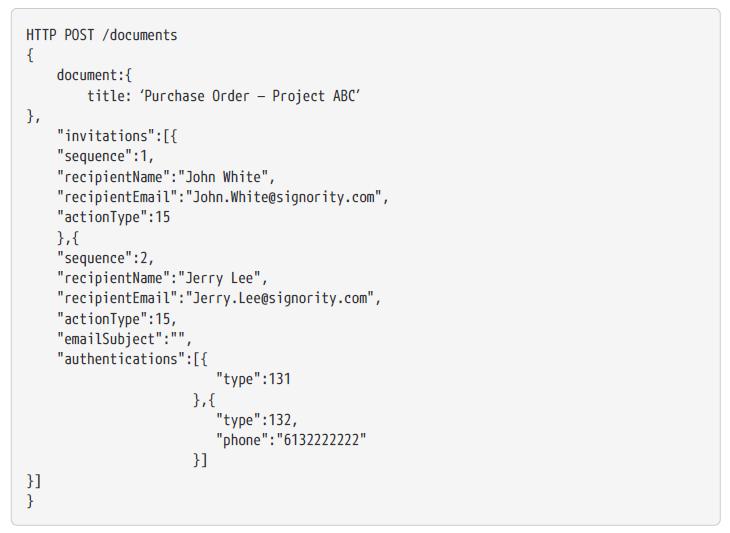
Another, quicker way to add signers to the document can be done during document creation time. This will combine this step with the previous step into 1 API call. The following example shows how to create the document together with the same invitations list.
POST /documents/{id}/files.html
When looking to upload a file to the document a POST call must be made to documents{id}/files.html. A file object is expected in the request body. Once it reaches the server, this file will be appended to any other existing files in the current document or it will be set as the first if there are no other files.
HTTP POST /documents/{id}/files.html
A successful response message will be as follows:

The success message will return the uploaded file information as well as the standard success status of the API call.
PUT /documents/{id}
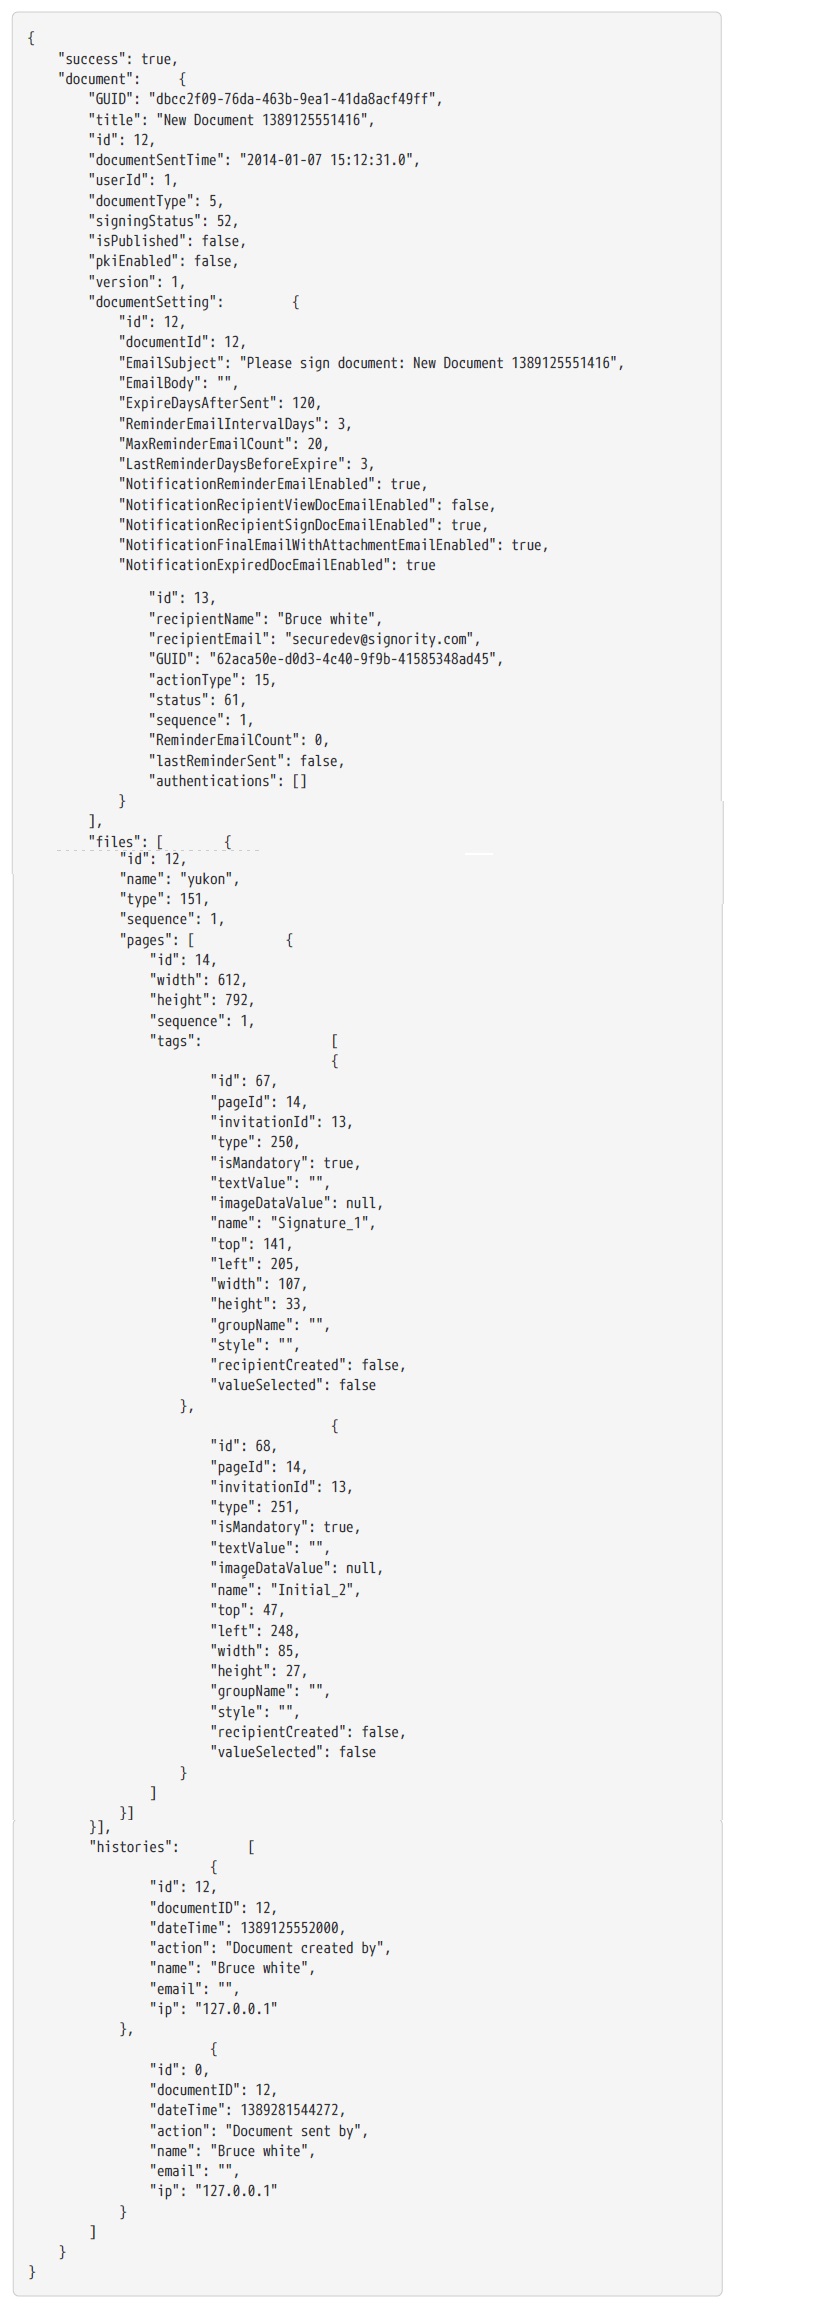
To send the document for signatures you must make a PUT call to documents/{id}. In this call all created tags should be sent along with the document so that they are merged and attached along with the document for signatures. In addition to these tag objects, a signing status object must be included.
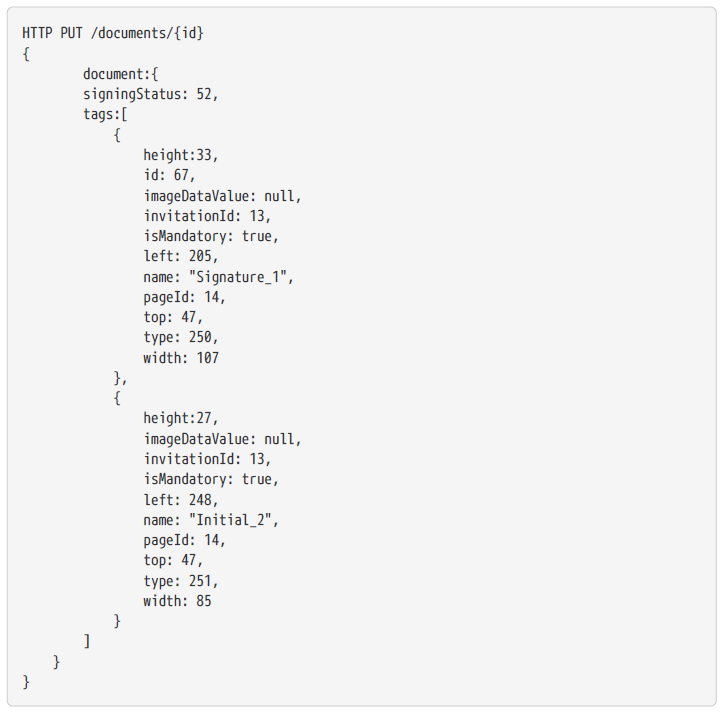
If a tag object already includes an id, the existing tag with that id will be updated if one exists. To create and update a new tag onto the document, append another tag object without an id. Once this reaches the server, a tag will be automatically created and given an id as seen in the response below. The response you’ll get back from this will be the full document object along with all its invitations, files, tags and histories as seen below:
