When working with documents online, a document sender may need to obtain highly sensitive Personally Identifiable Information (PII)—like credit card numbers, social insurance numbers—from their recipient. Senders can maintain high standards of privacy and security while obtaining such sensitive information by using the Signority Masked Text Tag.
The Signority Masked Text Tag is like a regular Text Tag, and senders can request any type of information from a recipient using the Masked Text Tag. In order to use the Masked Text Tag, simply drag and drop the tag from the left-hand side list of tags onto the document in the appropriate place.
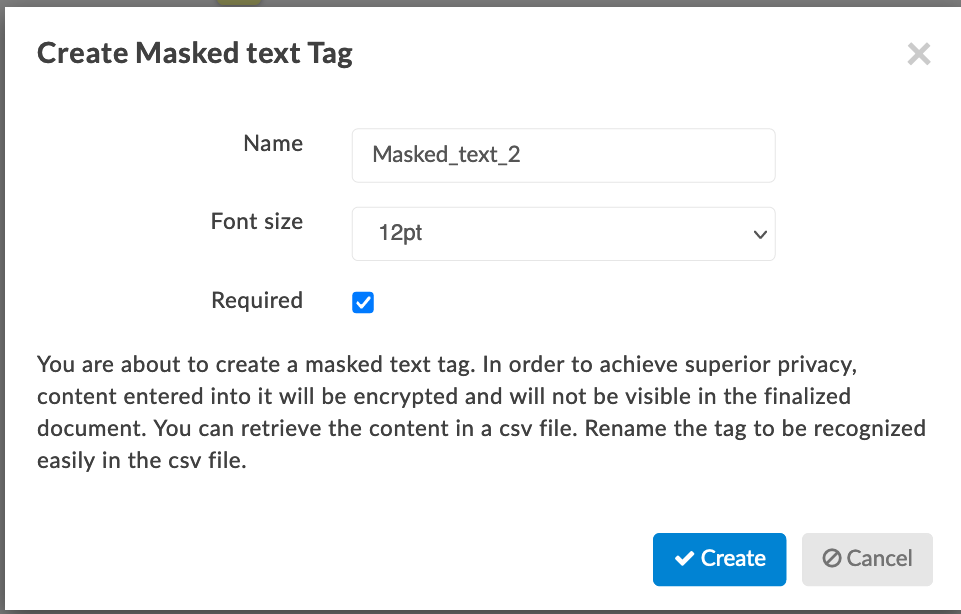
Once you drag and drop the tag, a popup window will appear, prompting you to change the name of the Masked Text Tag to something more recognizable. This is especially important if you are requesting more than one piece of sensitive information, since you will be retrieving the masked information through a .csv file.
Sending out a document with a secure masked field works the same way as any other document.
On the recipient side, a recipient can enter in the requested information into the tag area. Once the recipient clicks away from the tag, any content entered into it will be hidden with the tag’s name, followed by asterisks. At any point in time before finalizing the document, the recipient can click the tag, review the information that was entered, and edit as needed.
Once the document has been finalized, you can access the finalized PDF document either from the email notification that you receive, or you can access the document from your Signority account. The finalized PDF will have the content entered into any masked tags encrypted and hidden. In order to access the sensitive information, you will need to navigate to the document under the “Documents” page in your account, and click on the Document Title to view the document. In the page to view the document, click on the “More” dropdown menu in the top right corner. You will see an option to “Export masked tags to .csv file”.
Clicking on this option will automatically download a .csv file containing the information stored in the Masked Text tag(s).
Once the requested sensitive information has been recorded and stored securely, you will have the option to permanently delete the masked tags values from your Signority account. In the same “More” menu, simply click on “Delete masked tags values”. You will see a popup window asking you to confirm the deletion.
Once you have confirmed the deletion, all content that was entered into any Masked Text Tags will be permanently deleted, and you will no longer have access to it. In addition, the options to export and delete the masked tags values will no longer be available under the “More Dropdown”.
Copying other users on Overage Notifications and Invoices
You can set your account up so that invoices and overages can be sent to up to 20 other email addresses. To control who you want to receive these notifications, simply go to “Profile Settings” in the top right dropdown menu. From there, go to “Account” and find the option at the bottom of the page title “My Invoice”. Check the checkbox and then enter up to 20 email addresses. Make sure to separate each email address with a comma.
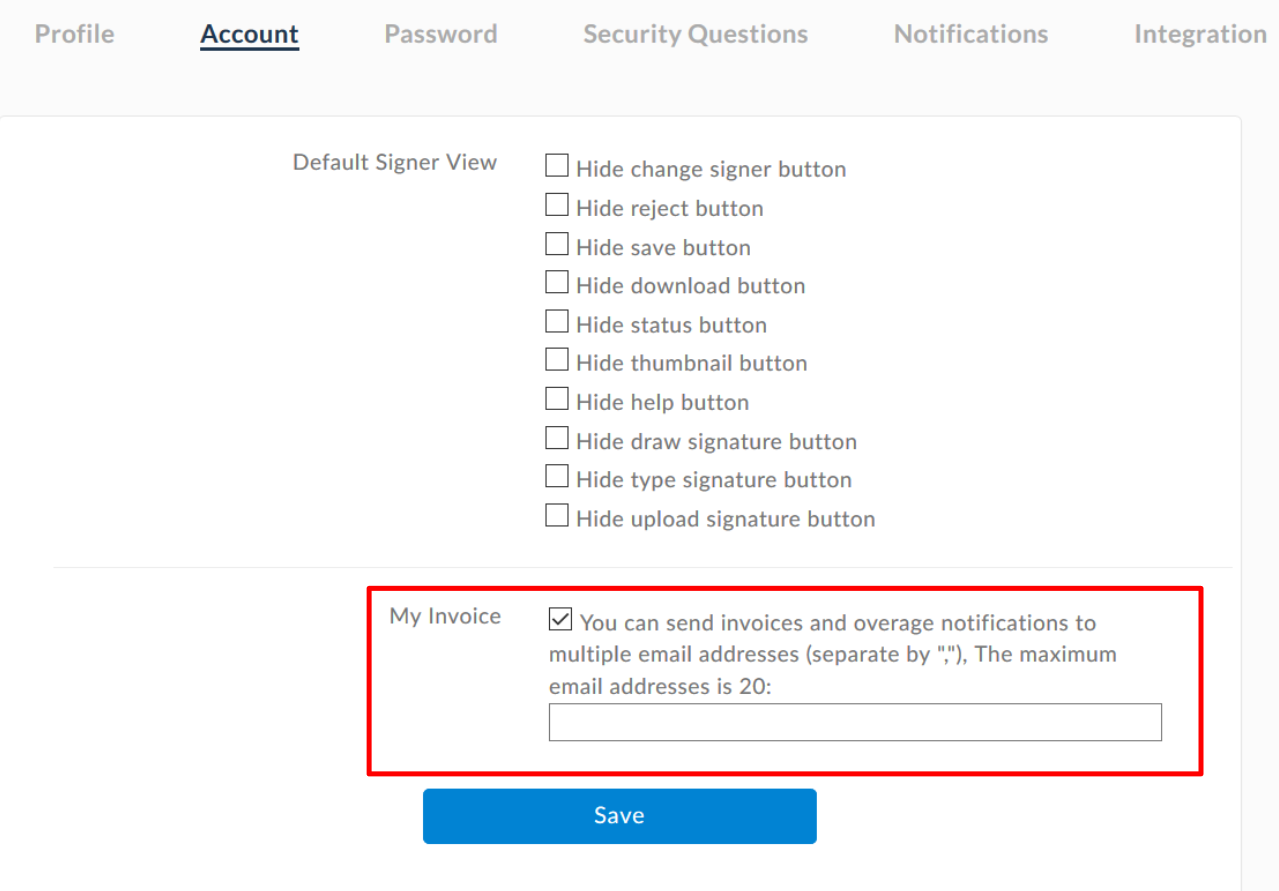
Once you’re done, hit “Save” and your invoices and overage notifications will be sent to the saved email addresses. Now you won’t need to take the time to forward your invoices via email; it can be done automatically for you!
Signority Integration with Amazon S3 Bucket for Storage
With the release of Sprint 44 on November 19, 2019, you could to store signed documents from your team in your Amazon S3 bucket. Here’s a quick step-by-step on how to set up this exciting new integration!
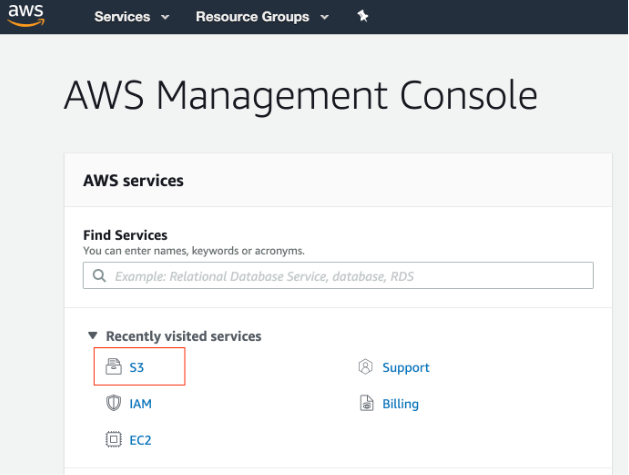
First, you need to register an Amazon Web Services (AWS) account. After your account is set up, go to your AWS console and select “S3” from services menu.
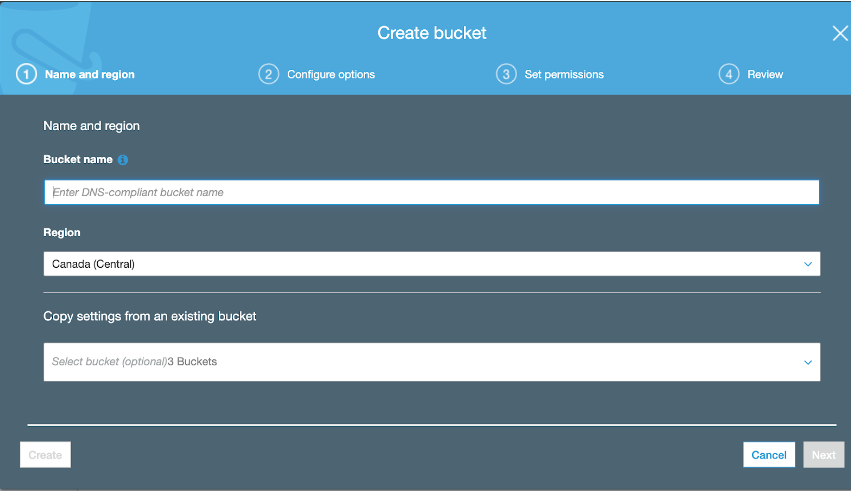
Once you arrive at the S3 console, create a bucket, and give it a name. Bucket names are global and you cannot use a name that others have used.
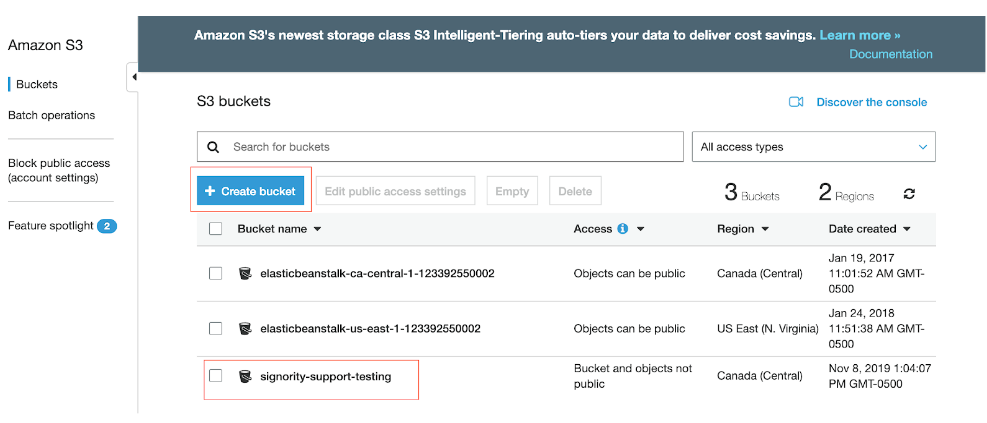
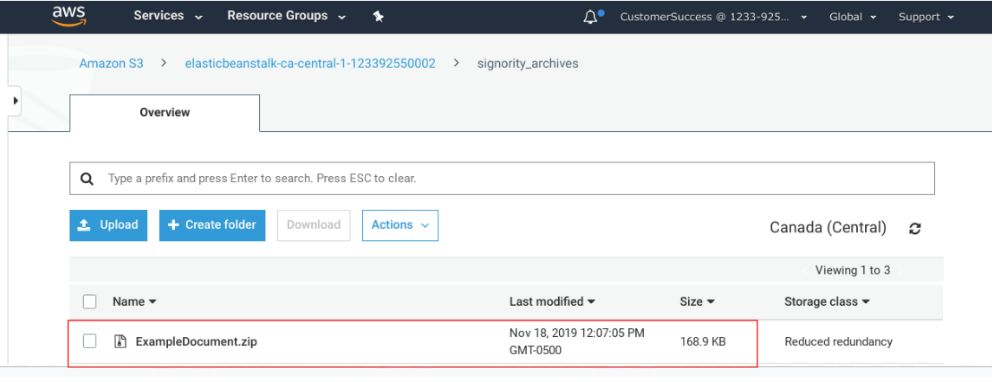
Once you have created the bucket, you will see it show up on the console.
Now, you will need to get your Access Key ID and your Secret Access Key.
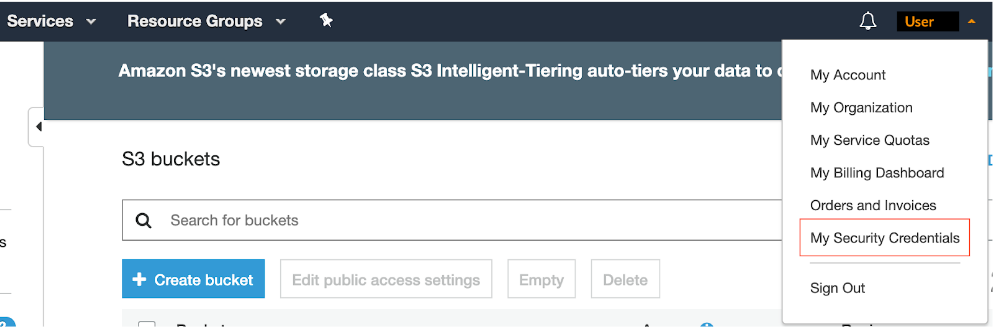
Go to your account and select My Security Credentials to find your Access Key ID and Secret Access Key.
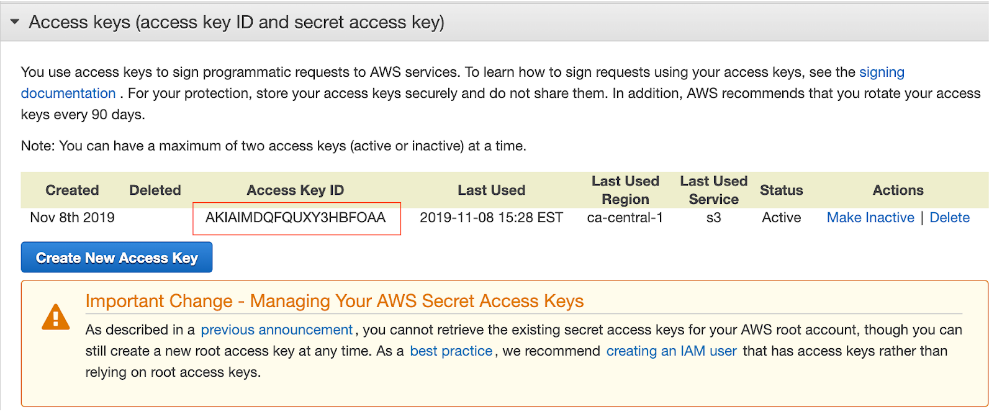
If you don’t have an Access Key, select Create New Access Key.
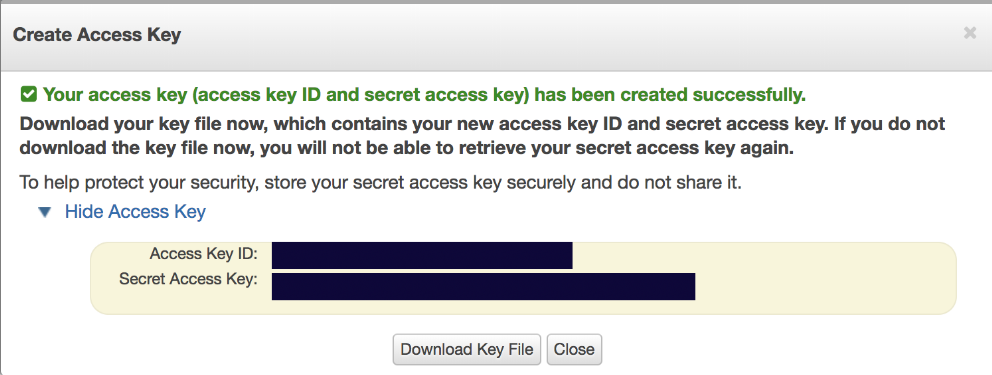
Then, save your keys. You will need the Access Key ID and Secret Access Key to activate the integration in Signority.
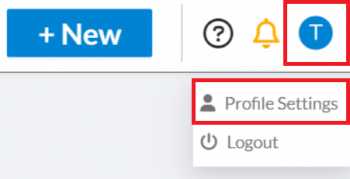
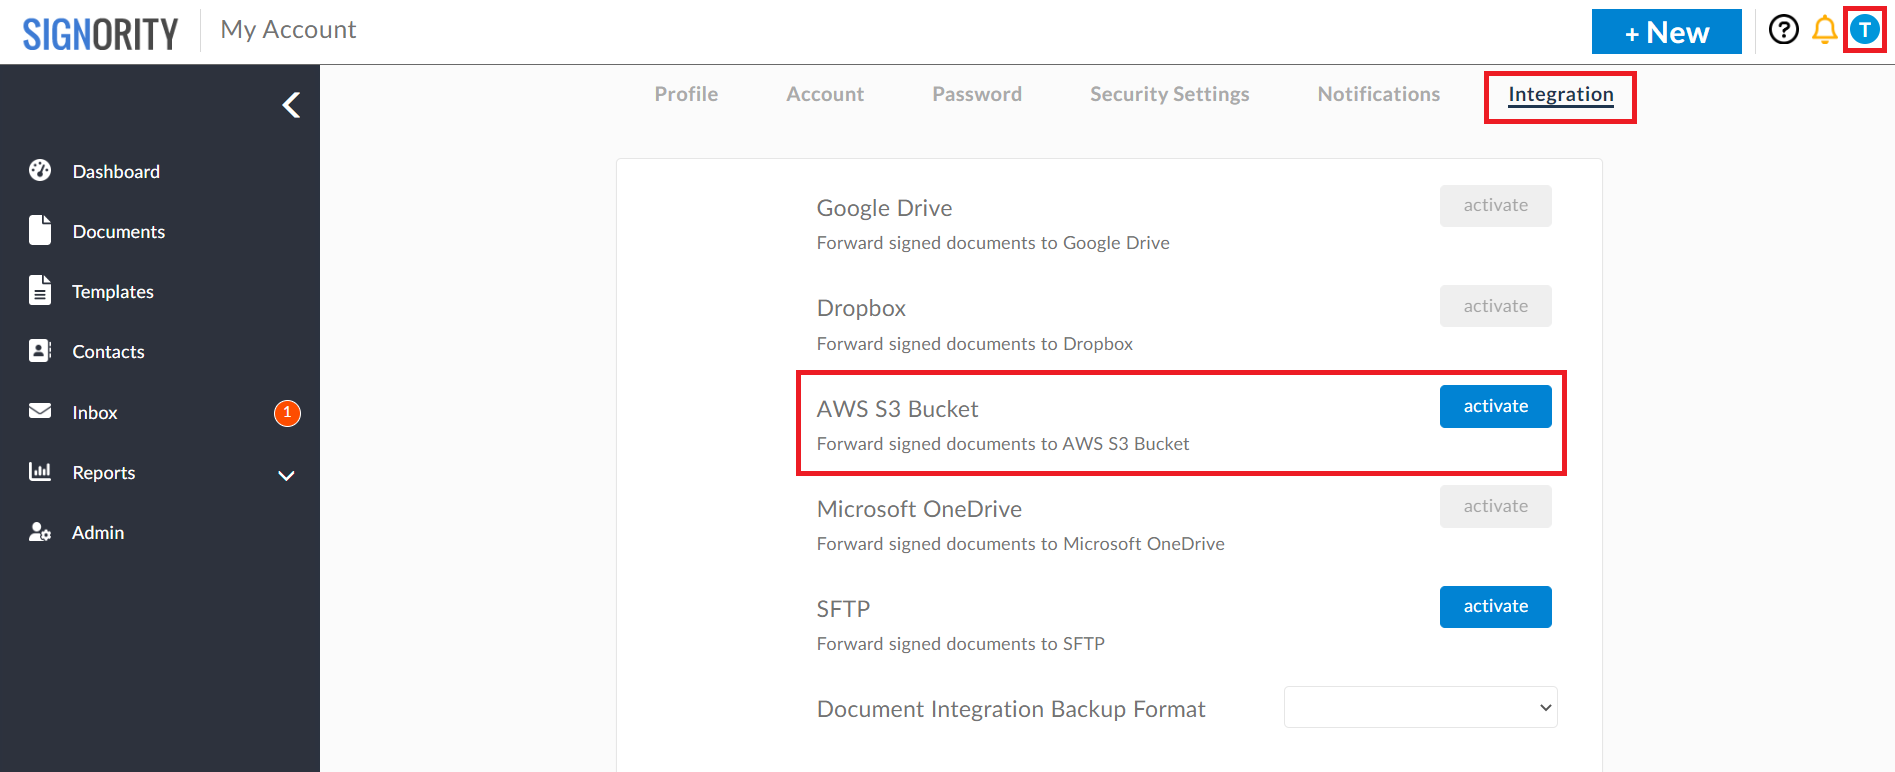
Once you have done that, sign into your Signority account and click on “Profile Settings”.
Click on the Integration tab then click on Activate next to AWS S3 Bucket.
You will see a pop-up window where you enter your Access Key, Secret Access Key, Bucket name, and Region.
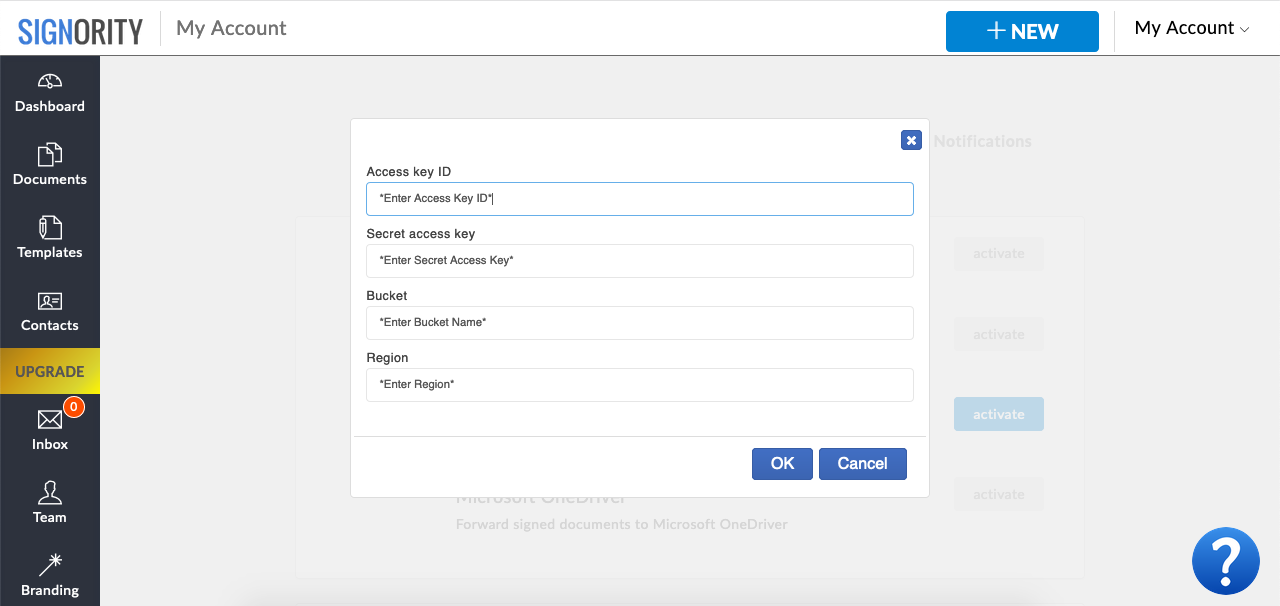
Once you’ve entered all the information, hit “OK”, and you’re ready to start signing! You should see a test document named “Welcome_to_Amazon_s3” appear in your S3 bucket. From now on, whenever a document is finalized, a zip file will be saved in the S3 bucket. Anyone on your team can create documents to be stored in the bucket.
The billing admin and proper team admins can configure the S3 budget setting. Regular users don’t have permission to configure the integration.
Also, if at any time you want to deactivate Amazon S3 integration, just click on the “Deactivate” button. You can find it in the same place that you activated the integration.
More storage integrations with Google Drive, Microsoft OneDrive, and Dropbox will be coming soon!
Global Profile Settings for Teammates by Administrators
The Global Profile Settings are only available to the Billing Admin and Super Admins for editing.
To Access Global Settings:
1 – From the User Dashboard click on the Admin Icon in the black left sidebar menu.
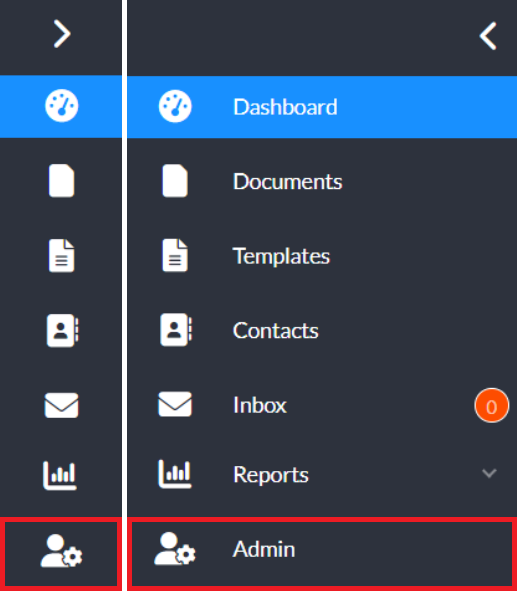
2 – From your Admin Dashboard click on the Users & Teams Icon in the black left sidebar menu.
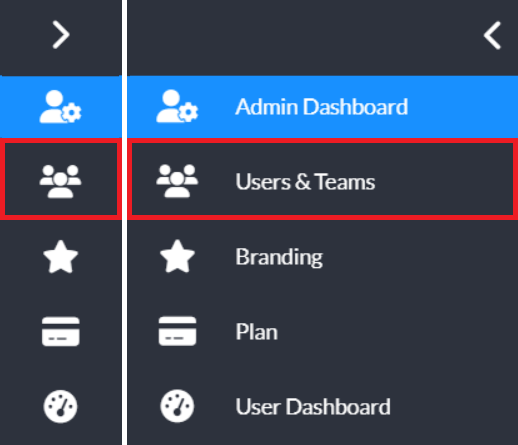 3 – In the Team Page you will see Global Settings in the menu above the team listings.
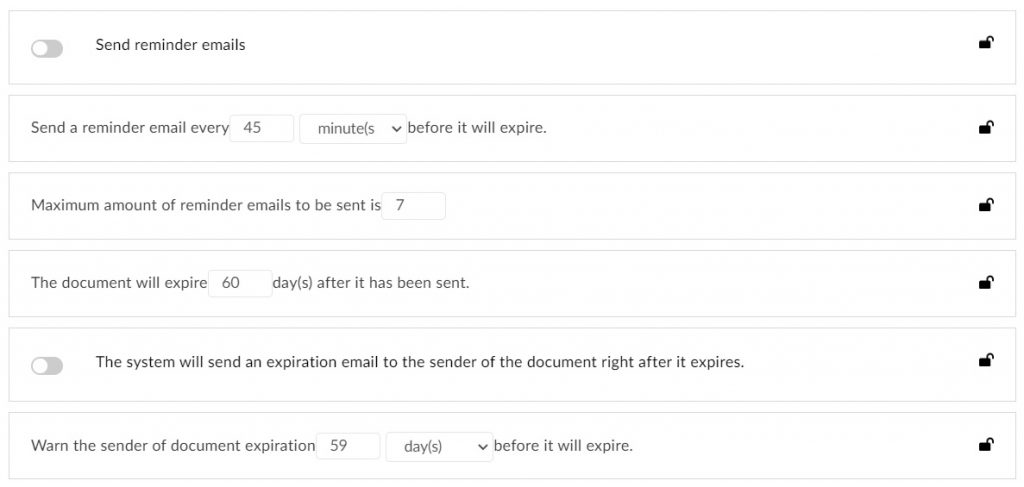
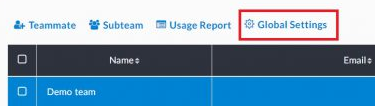 4 – Clicking on the Global Settings will open the Global Settings modal window. This window will allow you to customize and lock team settings in four (4) categories:
a) Email Reminder Notifications
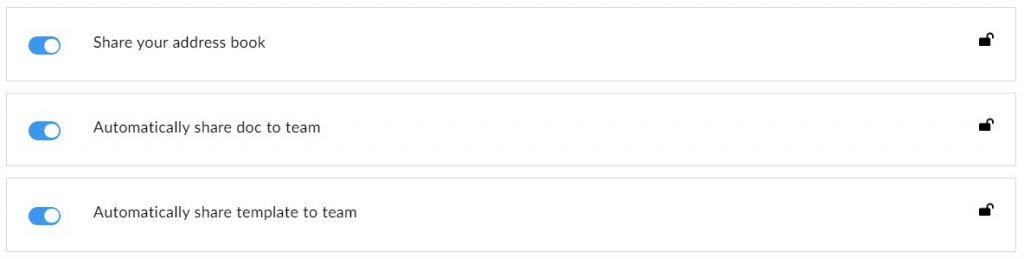
b) Sharing of Contacts, Documents, and Templates
c) Enforcing Two Factor Authentication (2FA)

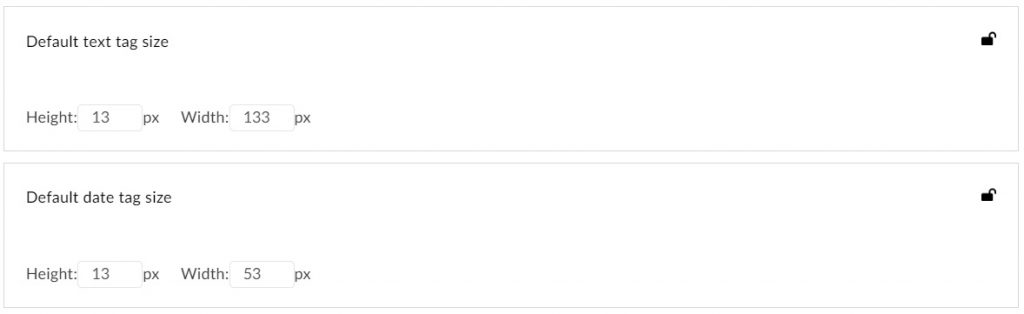
d) Setting default Text and Date Tag sizing.
5 – You may also lock the settings you have chosen either individually, or you may lock them all at once by using the “Lock All Settings” option at the top right of the Global Settings window.

Sharing Documents and Templates with Your Team
A document or a template can be shared by any of the roles within your team. When the document or the template is shared, it will be shared to the subteam where the user is in.
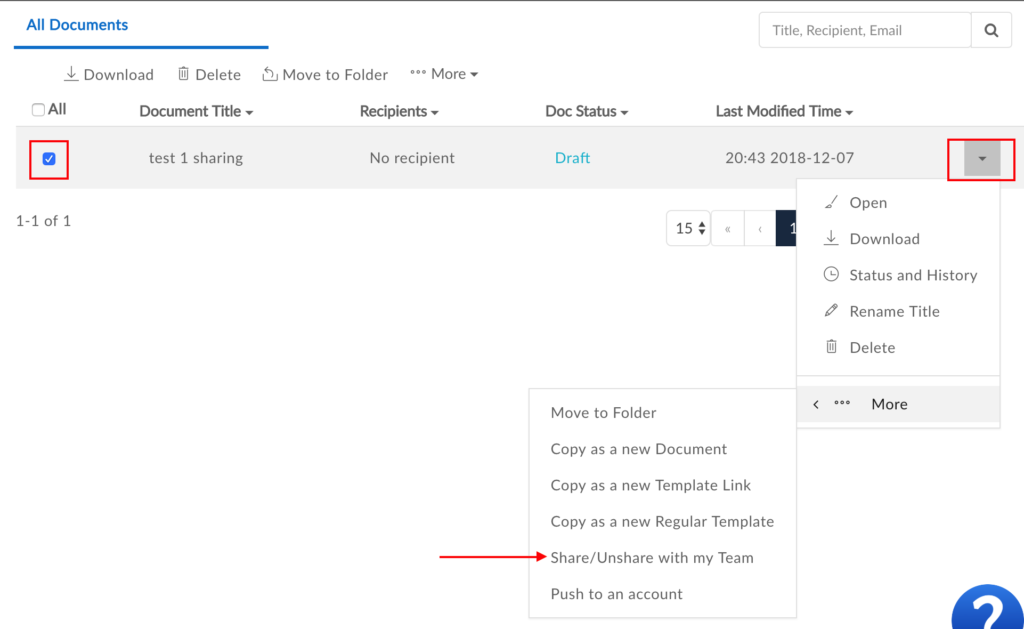
Select the file, From the action drop-down menu, chose “Shared/Unshare with my subteam.
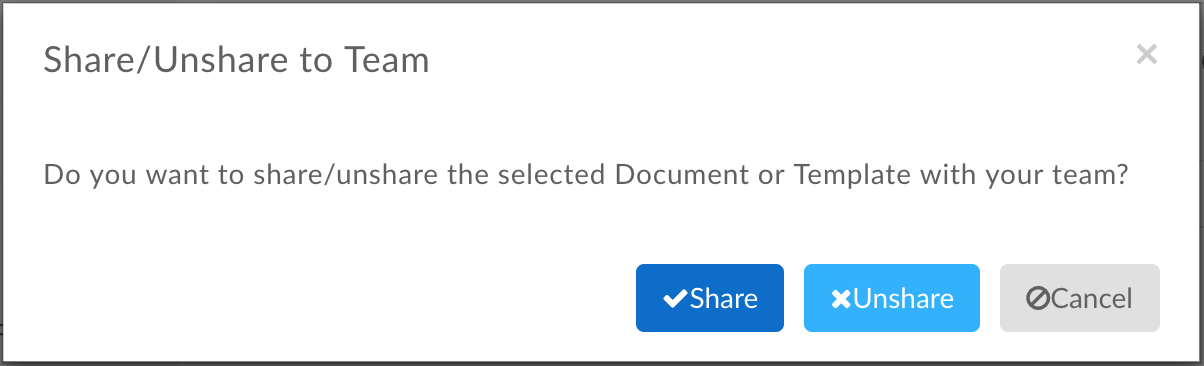
A notification window will pop up. Select “Share”.
If you do not want to share the file, go through the same process and select “Unshare”.
Be aware there is a general setting in the “Profile Settings” under “My Profile”.

By default, document sharing is OFF and template sharing is ON.
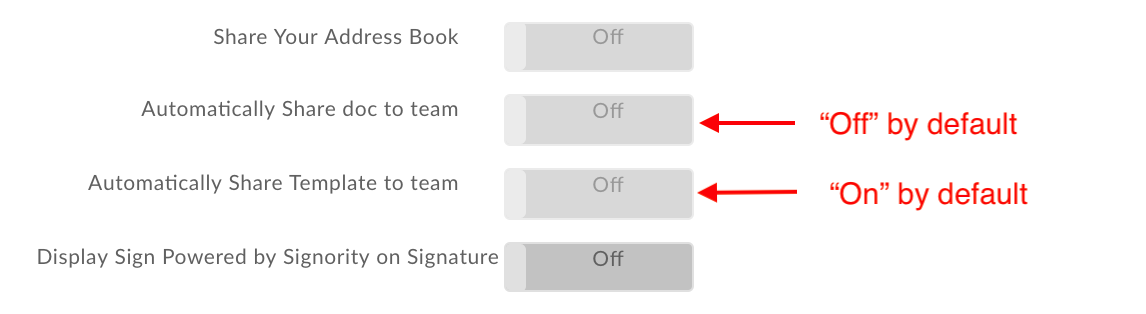
If you turn the Automatically Share doc to team “On”, each newly created document will be a shared document to your subteam.
Tags Overview
Tags are what allows your signers to modify and add information to the document. Having a good understanding of what each tag does will help simplify the process when you create eSignature documents.
To get started, here’s the list of tags that are available for use with Signority. We’ll go over each tag’s function, settings, and what it looks like on the user end.
The following tags are available in Signority:
Signature Tags 
Signature tags allow recipients to add their signature to a document. Signority allows for three signature methods by default – drawing a signature, typing a signature, and uploading a picture of a signature. You can also create your default signature design for one click signings. There aren’t any settings other than whether to make a signature tag mandatory or optional by using the cogwheel when the tag is selected.
When the document is sent out and the recipient is ready to sign, they need to click the signature tag. The signature window will appear and the signers have the option to Draw, Type, or Upload their signature. Click Apply when you’re happy with the signature to add it to the document.
Note: When typing signatures, the name that was entered as the recipient is prefilled initially to save you time.
Initials Tags 
Initials Tags are often used on documents to prove that the signer has viewed and read a page (though Signority has other options for this use case).
Initials function the same way as signatures. The settings are also the same, where you can change whether it is mandatory or optional.
For the signers, they can click on it to bring up the signature window and you can Draw, Type, or Upload your initials, similar to how it works for the signature tags.
Note: When typing initials, the name that was entered as the recipient is prefilled initially to save you time.
Text Tags 
Text tags allow your signers to input information into a document, such as their name, address, or email, for e.g. 
The settings for the text tags is fairly simple. You can make a tag optional or change the font size to match your document.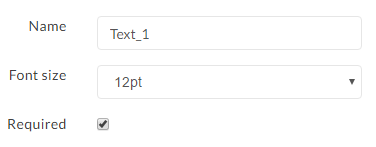
For the signers, they simply need to click on the tag and begin typing to enter the appropriate information for the document.
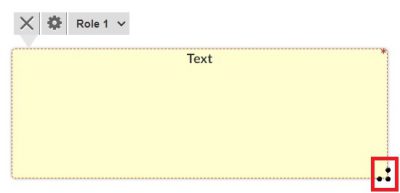
You can also expand the Text Tag into a multi-line tag simply by dragging and expanding it using the three dots in the lower right corner of the tag – as shown below. The amount of characters and lines that they can enter will be dependent on the size of the tag and the font that you have set. The amount of characters is restricted to the size of the tag you have set.
Number Tags 
Number Tags are a type of fillable tag, much like a text tag, that you can assign to your signers. Signers can only input digits into a number tag. This makes it ideal for collecting ages, phone numbers, dollar amounts, and other information that consist of just numbers.
Masked Text
When working with documents online, a document sender may need to obtain highly sensitive Personally Identifiable Information (PII)—like credit card numbers, social insurance numbers—from their recipient. Senders can maintain high standards of privacy and security while obtaining such sensitive information by using the Signority Masked Text Tag.
The Signority Masked Text Tag is like a Regular Text Tag, and senders can request any type of information from a recipient using the Masked Text Tag. In order to use the Masked Text Tag, simply drag and drop the tag from the left-hand side list of tags onto the document in the appropriate place.
Once you drag and drop the tag, a popup window will appear, prompting you to change the name of the Masked Text Tag to something more recognizable. This is especially important if you are requesting more than one piece of sensitive information, since you will be retrieving the masked information through a .csv file.
Sending out a document with a secure masked field works the same way as any other document.
On the recipient side, a recipient can enter in the requested information into the tag area. Once the recipient clicks away from the tag, any content entered into it will be hidden with the tag’s name, followed by asterisks. At any point in time before finalizing the document, the recipient can click the tag, review the information that was entered, and edit as needed.
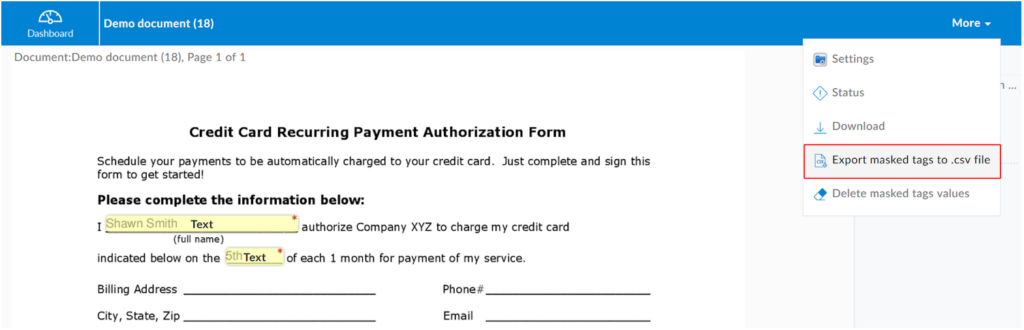
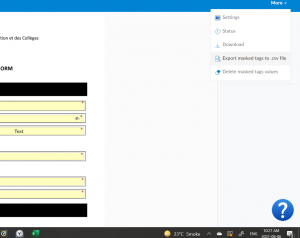
Once the document has been finalized, you can access the finalized PDF document either from the email notification that you receive, or you can access the document from your Signority account. The finalized PDF will have the content entered into any masked tags encrypted and hidden. In order to access the sensitive information, you will need to navigate to the document under the “Documents” page in your account, and click on the Document Title to view the document. In the page to view the document, click on the “More” dropdown menu in the top right corner. You will see an option to “Export masked tags to .csv file”.
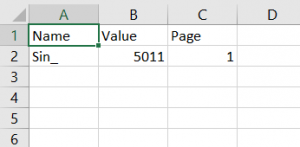
Clicking on this option will automatically download a .csv file containing the information stored in the Masked Text tag(s).
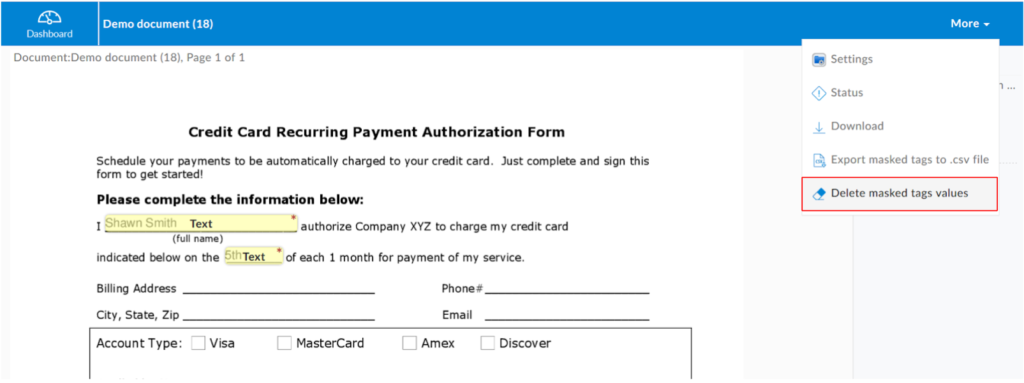
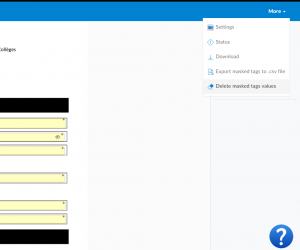
Once the requested sensitive information has been recorded and stored securely, you will have the option to permanently delete the masked tags values from your Signority account. In the same “More” menu, simply click on “Delete masked tags values”. You will see a popup window asking you to confirm the deletion.
Once you have confirmed the deletion, all content that was entered into any Masked Text Tags will be permanently deleted, and you will no longer have access to it. In addition, the options to export and delete the masked tags values will no longer be available under the “More Dropdown”.
Note Tags 
Use the Note tags to leave instructions on the document for individual signers. These can act like sticky notes for you to leave for your signers. You can assign them to specific signers so that they are visible only to that person.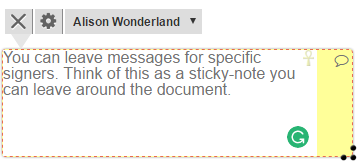
The settings for this tag is the same as for text tags, where you can change the font size, but there are no mandatory or optional settings for this tag.
For the signers, they will see the same information you typed in and when the document is completed, the tag will disappear from the finalized document.
Date Tags 
The date tag is an easy way for your signers to date their signature or parts of the document. The default date format is MM/DD/YYYY.![]()
To change the date’s format, click on the date tag and then the settings cog that appears above. In the settings option, you can change the font sizing to match your document, as well as change the date format to one better suited for your document. Of course, you can also set the tag to optional. If you accidentally populate the tag with a date you can easily remove it by hitting your ‘delete’ button.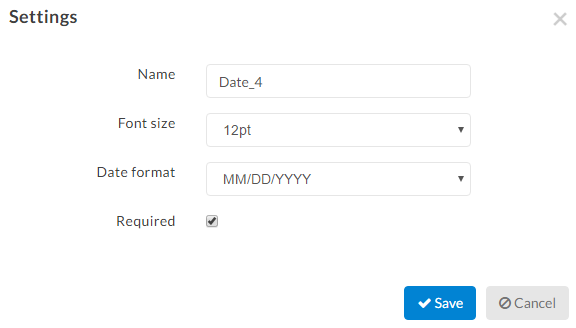
For the signers, the date tag is simple to use. Click it once to add the current date, and a second time to bring up a calendar to select a past or future date.
Checkboxes 
Checkboxes are great for collecting multiple choice information from signers. This is great when the question allows signers to select more than one option. By default, checkboxes are optional, but you can set them to required.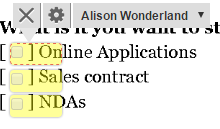
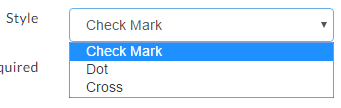
The checkbox settings are straight forward, you can select different styles of checks, between a checkmark, dot, and cross, for whatever your needs are. Just click on the settings cog when selecting a checkbox tag and bring up the settings window. 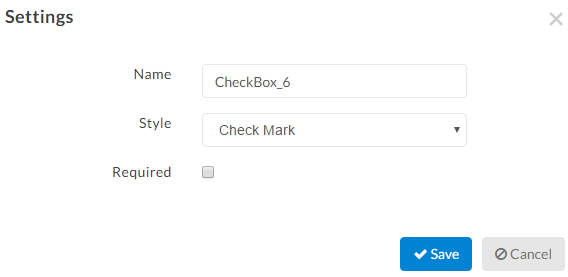
Under Styles, select the most appropriate indicator and then click Save.
When the signers are using checkboxes, the styles will be applied to the finalized document. The style will not be visible as the signer is using the checkbox on the signing page directly. The finalized PDF, however, will show the style you selected when preparing your document.![]()
Radio Buttons 
Radio buttons are useful when you have an either/or question, such as gender, education, etc.
When you drag a radio button over, you’ll first be asked how many buttons will make up the group. The signer can only select one out of that grouping of radio tags. You can tell which radio tags are grouped together because the name of each tag will be the same. This means that if you entered the wrong number of buttons, you can add more by changing the names of the radio tags from the 2nd group to match the first.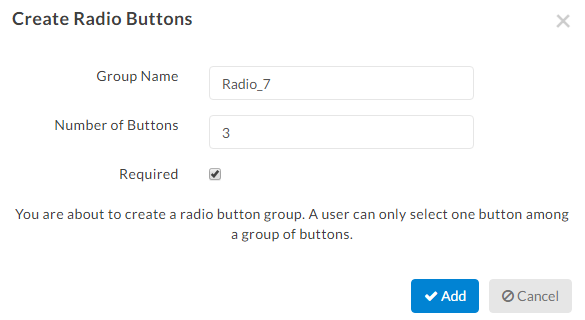
Because these radio tags are grouped together, when they’re mandatory, one of the tags in the group must be selected by the signer to satisfy those settings. For the signer, they simply need to click on the radio that is next to their answer.
As a sender, you can pre-select one of the radio buttons before sending out a document to your signer. Don’t worry, your signer will always be able to choose an option on their own.
Dropdown Menus 
Dropdown menus allow a signer to choose one option from a list that you create. This is great for things like selecting which province or country someone is from, or which features or options are best for the signer, etc.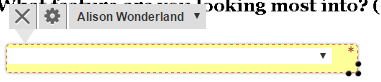
To set the options available in a dropdown, click on the tag in the document and then the settings cogwheel. Under the Values section, enter each option in separate lines, and each line will become a selectable option for your signers. You can also change the font size or make the tag optional as well. Once you’re done, click Save to continue.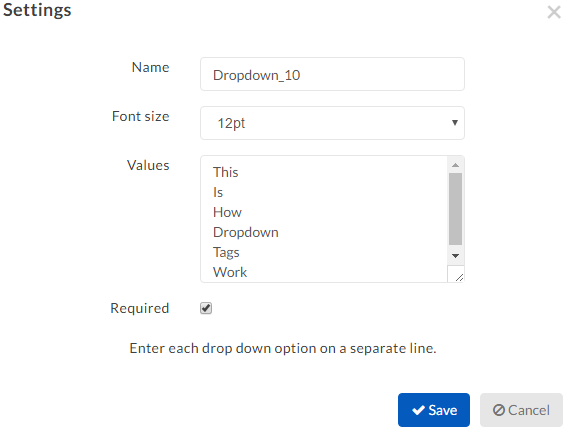
When the signers use the dropdown menu, they will see the options you designated and can then select the most appropriate one for the document.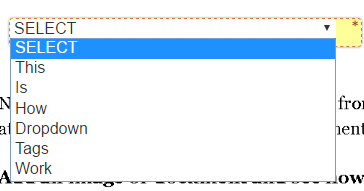
Attachment Tags 
Attachment tags allow signers to upload and attach files to the document. This is really useful for accepting void cheques or bank statements, etc.
A signer can only add one attachment per tag, so if you need multiple documents from them, multiple tags will be required. You can make them optional if you wish.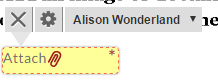
For the signers, when they click the attachment tag, the Files window will pop up and allow you to upload a file from your computer.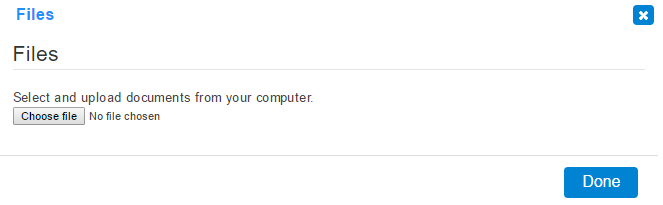 When the file is successfully attached, the paperclip will disappear and be replaced with a checkmark as seen below.
![]() All successfully attached files will be added as a new page at the very end of the document and will be included in the finalized document.
All successfully attached files will be added as a new page at the very end of the document and will be included in the finalized document.
Prefilling Tags
While designing the document, you can enter content into tags by simply clicking and filling in the content you would like to be prefilled. By default the signer can then update or modify the content if needed. Or, you can lock the tag to make it ‘read-only’. This setting ensures the signer cannot modify the content.
Further Reading
Creating Electronic Signature Documents for Others
Creating a Default Signature Design
Assigning Tags to Other Signers
Adding A Signing Order for Your Documents
By default, Signority sends the document to everyone all at once, and they can sign as soon as you send the document. However, if your document has a specific workflow that people need to sign in, you can create a Signing Order to send out signing invitations in a specific sequence.
Setting Up a Signing Order
The process for sending the document out is the same as how you create electronic signature documents, just with a few changes.
- Begin by creating a New Document using the +New button.
- Upload the document that has a specific signing order.
- On the Recipients page, add the appropriate number of signers needed.
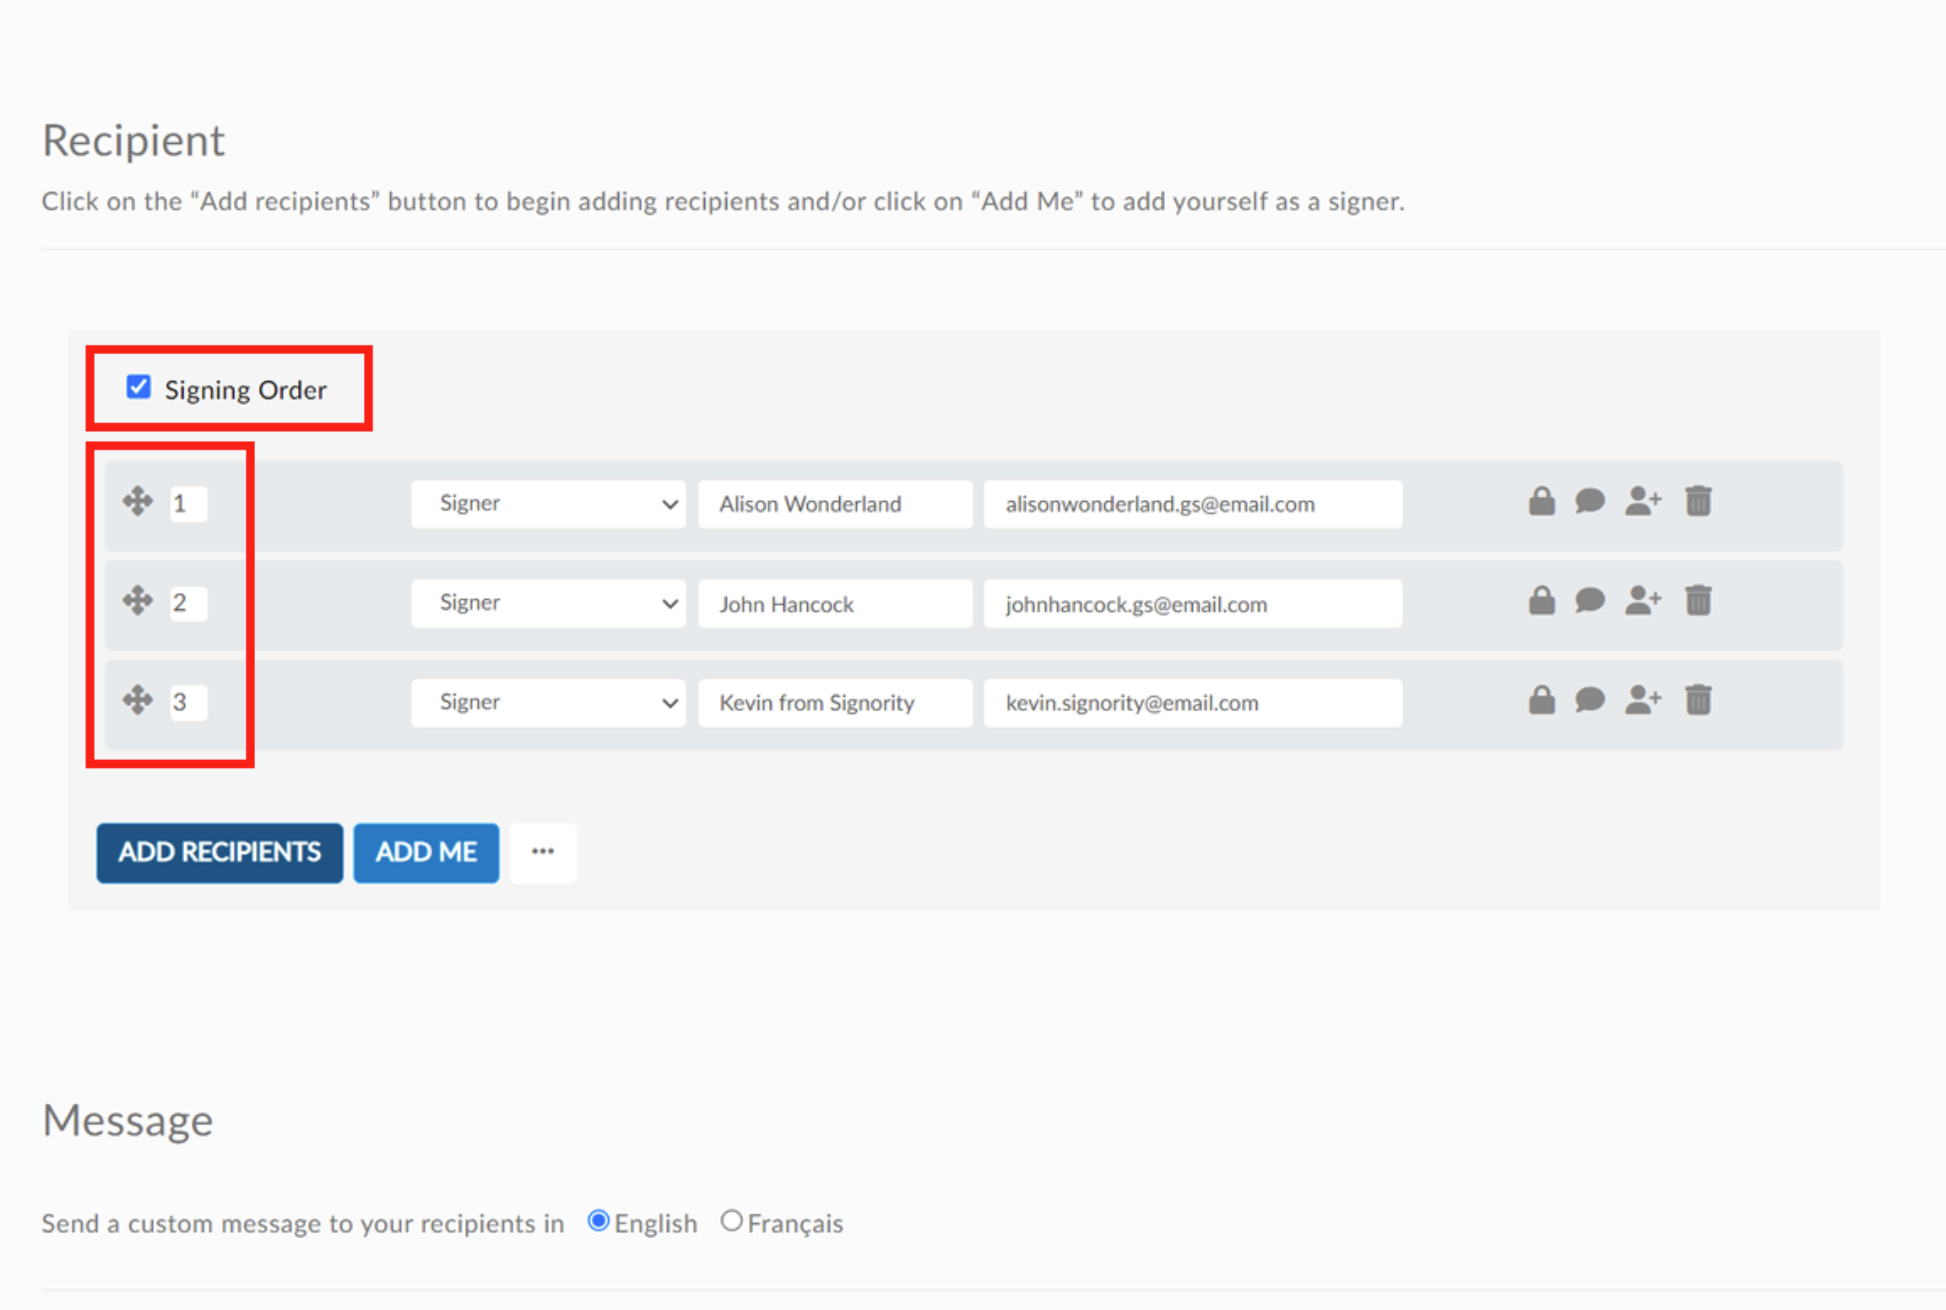
- Click Signing Order to create a sequence.
- Drag & sort the recipients in the correct order, or set their signing order number manually.
 When you’re done, move to the Editor page and add the Tags needed. Assign tags to the right signers. Once completed, click Next to send the document.
In the example above, the workflow goes in the following sequence:
- Alison Wonderland receives the invitation first. When she completes the signing process, John Hancock will receive their invitation. When he submits the document, Kevin from Signority will be the last signer and receive their email.
When a sequence is created, invitation emails will only send after the previous person in the sequence completes their signing.
Note: You can allow multiple people to sign at the same step, just give them the same signing order number. For e.g. if Kevin from Signority, in the example above, was set to the 2nd signer as well as John Hancock, but John and Kevin will receive the invitation email simultaneously after Alison Wonderland submits her signature.
When a signing order is used, recipients who aren’t able to sign yet will be listed as “Invitation not Sent” in the Recipient List Page.
Customize Signing Order When A Recipient Rejects the Document
Role(s): Individual User, Team Admin, Super Admin
By default, if a recipient rejects the document, Signority will automatically continue the workflow by sending the document to the next recipient. However, you can also choose to cancel the document and choose if you want to send an email notifying the signers or not.
- To do this, open Global Settings (For team admins this is in the admin console under Settings)
- Under Signer Options select the dropdown for “Signing flow behavior when a recipient rejects:”

- Choose what workflow you would like to happen if a recipient rejects the document
- Continue with signing flow
- Cancel the document and send an email notifying the signers
- Cancel the document and do not send an email to the signers
- Select Save
Note: When “Cancel the document….” is chosen, the cancellation reason will be automatically generated as “Rejected by {{email of recipient}}”
Further Reading
Switch Signer Responsibility to Another Person as a Recipient
Sign Documents Online as a Recipient
Change Signers and Resend Invitation Emails
Template Overlay for Dynamic Documents
Ever have dynamic documents, such as an invoice or an expense form? The content of the document may change from use to use but the placement of the tags remain the same. In these instances, the Template Overlay can dramatically save you time and effort.
With the template overlay feature, you can create a template of a blank document, and then when needed, overlay the tags from the template onto a new document you have uploaded.
Preparing the Template for Overlay
To use the template overlay feature, you first need to make a template of the document in question. You can get a step-by-step guide on how to create your template here.
But briefly, begin by using the +New button in the top right and select New Template. When prompted, select the Regular Template option.
On the Editor page, Add the file you’ll use for the overlay and then Edit Recipients to create roles for your signers.
Once the Roles are created, add Tags to collect signer information by dragging and dropping them into place on the document.
When you’re done, click on the More option and select Save File.
Using Template Overlay
Now that you have created a template, you can use the Overlay feature whenever you create a new document.
Use the +New button again and this time select New Document. The process for document creation is the same as always, you can check out our guide here.
Begin by uploading the dynamic version of the template you want to overlay. Usually, this is when the user generates a new document for their signers, such as an expense form or an application, that has the changed content compared to the template. What you’re going to be using are the tags that are in the template and overlaying those tags onto the new document.
Once the document is uploaded, Add Recipients and edit any recipient settings you want, like automatic reminders, customized invitation emails, etc.
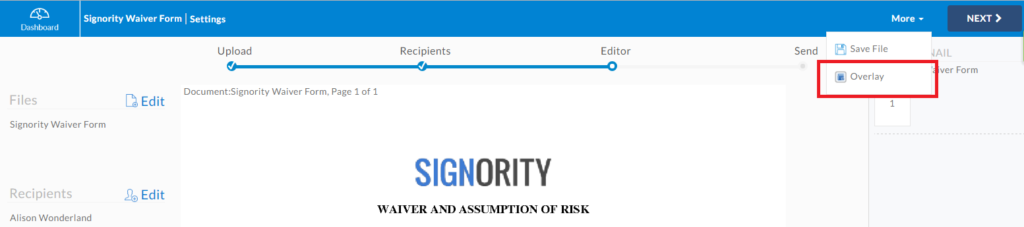
Once you’re done, move on to the Editor page. You should see the new document uploaded. Click on the More option in the top right and select the Overlay option.
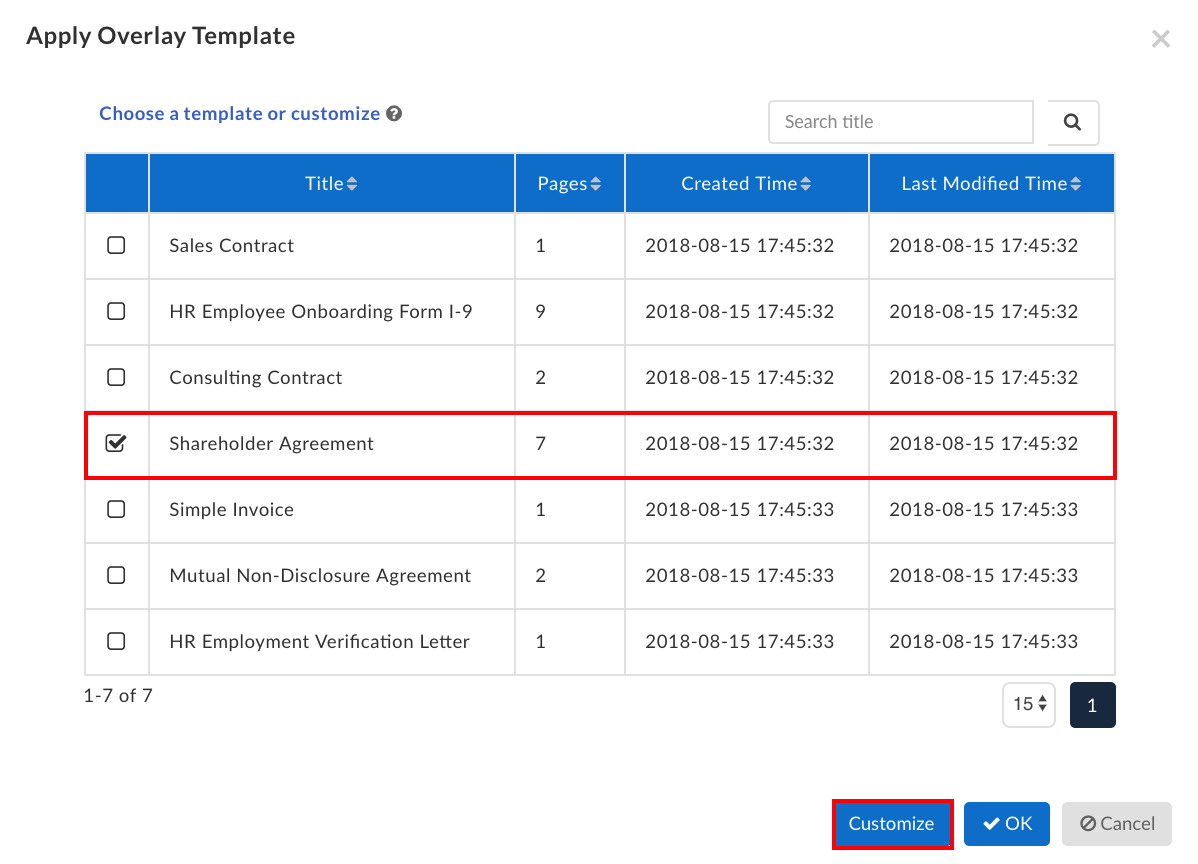
When prompted, select the Template Overlay you wish to use and confirm or customize.
When you have specific pages from the template to overlay to the document, Drag and Drop to the proper pages.

If done correctly, the overlay should be applied and the document will have the tags from the template visible on the Editor page. Add any extra tags you may need, make sure all the tags are properly assigned to their signers, and then send the document to collect your signatures!
Further Reading
Publishing Template Links for Online Document Signing
Bulk Send Documents for Signing
Track and Monitor Document Status and History
Assigning Tags to Specific Signers & Making Tags Optional
Tags are an integral part of Signority’s eSignature platform. This is how we’re able to collect any kind of information from your signers, so assigning tags to become a crucial part of the workflow. If tags are assigned or setup improperly, the workflow will need to start over, even if the signers entered their information and added their signature! So let’s go over the right way to do it and divert any issues before they happen.
Assigning Tags to the Right Signers
In any workflow in Signority, whether it’s with a regular document or a specific type of template, adding and assigning tags are a crucial part of the process. We’ll be going over how to assign tags to the right signers and what they look like for specific types of signers within Signority.
First, we’ll go over how to assign tags to specific signers.
If you’re sending out a regular document, the process will be the same. Upload the document you need signed and Add Recipients until your signer list is set.
When you get to the Editor page, drag and drop a tag into place and then click on it to bring up the options directly above. Use the drop-down menu to find the correct recipient. Notice that the tag colour will change to something else, making it easier for you to distinguish which tags are for which person.
By default, the tag will be assigned to the first recipient in the list, but as soon as you’ve switched recipients, we’ll assign new tags to the most recent recipient.
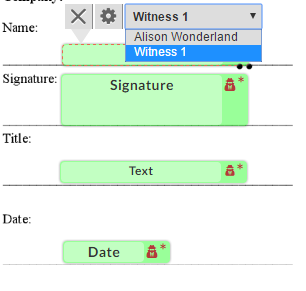
There are also minor changes for other signer types and roles. If your document needs a witness signing, you can set up a witness for specific signers. Tags that are assigned to witnesses, though, look slightly different than regular tags. You’ll notice the icon of a person to indicate a witness tag.
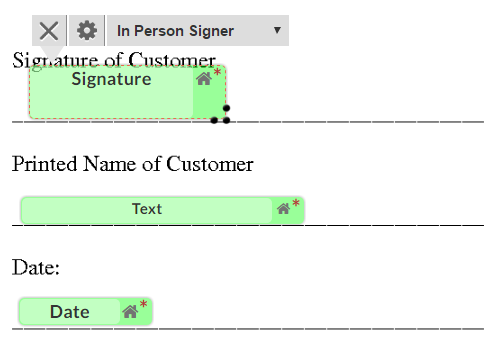
There’s also a slight difference for Signing Hosts. Signing hosts are used whenever you want to conduct an In Person Signing, for people who do not have email or for those who are present in person and still want to use eSignature. You can learn how to set up an In-Person Signing here.
With Signing Hosts, you’ll also notice that assigning tags to them will show with a house icon on the top right.
With these different tag images, it’s good to know exactly what each difference means so that you can complete your workflows without any hiccups. If you want an overview of what the tags do, click here.
Assigning Tags as Optional
With all of these tags so far, you’ll notice a * (asterisk) in the top right corner of each tag. This indicates that the tag is mandatory and signers are required to fill in mandatory tags to complete their signing.
To make a tag optional, select a tag and use the cog icon to bring up the Settings.
In the Settings window, uncheck the Required box and then click Save.
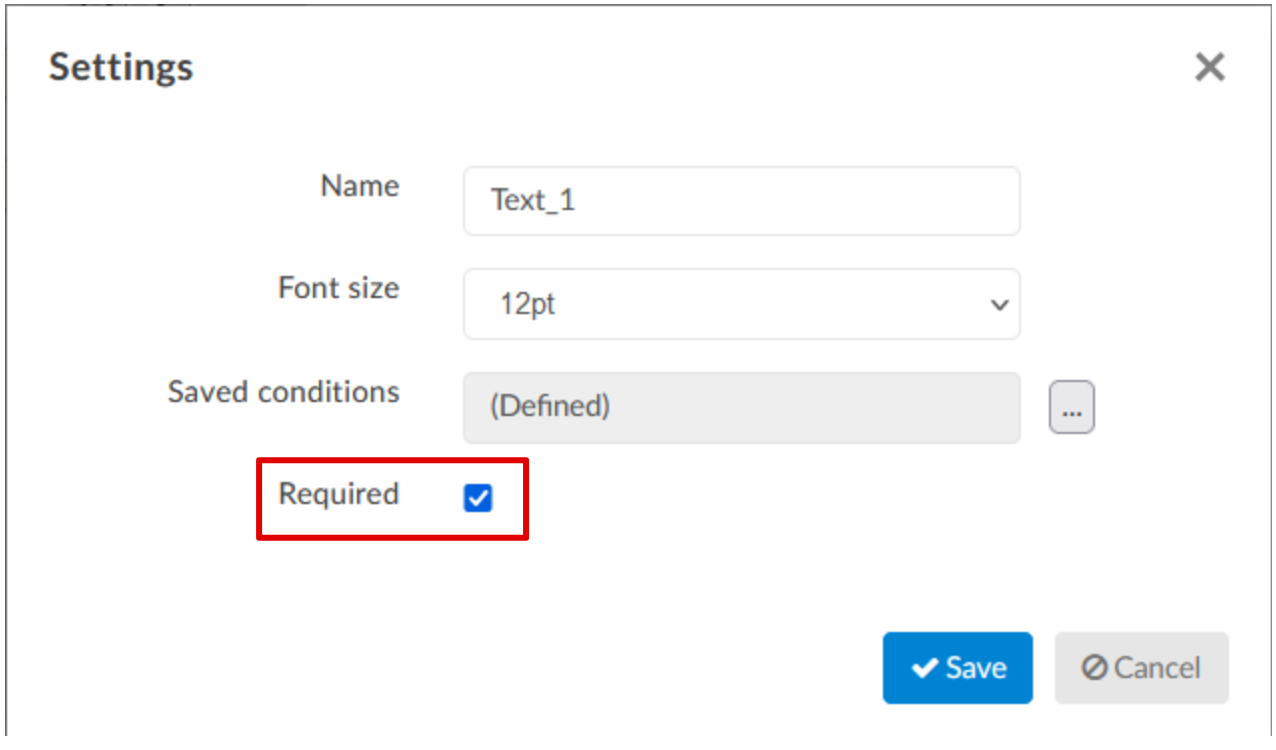
Once you’ve saved the settings for the tag, the tag will no longer have the * red star anymore.
That’s all for how to set up tags. Remember to ensure these steps are taken each time you start a new workflow to minimize the chances of wrongly assigned tags or having mandatory tags in places that should be optional.
Further Readings
Create Electronic Signature Documents for Others
Create an Electronic Signature Template for Easy Document Sending
Publish a Template Link for Online Signing
Using Page View Evidence for Sensitive Documents
There can be a wide variety of documents that require signatures. Sometimes, those documents require signers to agree and understand the full content and terms of the contract. In these instances, it’s often common practice to require an initial on each page to confirm the signer has read and reviewed the page. With Signority, these documents can be simplified even further with the Page View Evidence feature.
This feature adds a checkbox to the bottom of every page that signers will have to mark off in order complete the document. This information then gets captured in the document history and helps prevent any issues regarding accepting the terms of the documents.
Using Page View Evidence
Page View Evidence can be turned on for specific documents while you’re creating a document for eSignature. To get started, create a New Document using the +New button in the Dashboard.
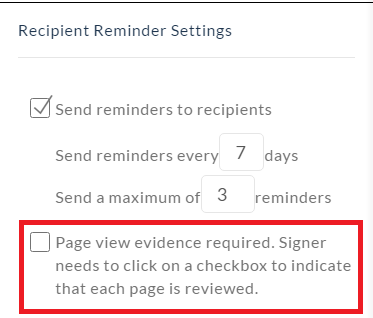
Upload the document you want to use and continue to the Recipient page. In the Recipient page, add your signers and edit the invitation email content if necessary. When you’re setting the Recipient Settings in the right-hand column, the Page View Evidence required option should be visible there. Check it to turn the feature on for the document.
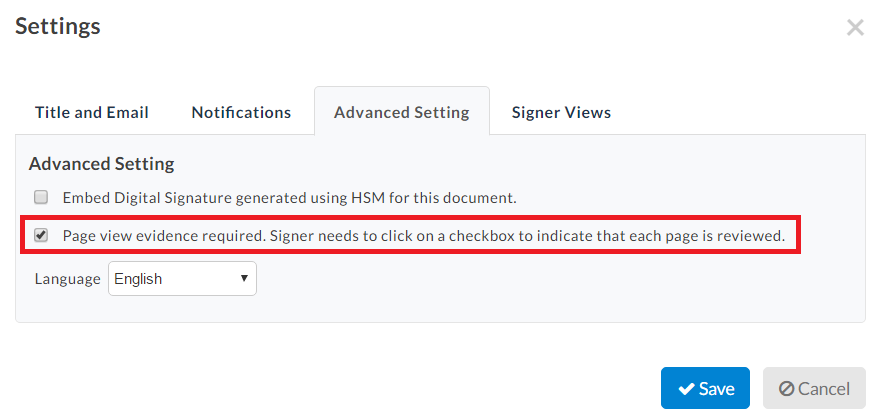
Continue to the Editor page to add your Tags. You will also have another opportunity to turn on Page View Evidence. Go to the Settings next to the Document Title. In the Advanced Settings tab, you’ll see the Page View Evidence Required option. Turn it on if you didn’t do it on the Recipient page.
When you’re finished adding all the tags, click Next to send the document off for signature.
Capturing Page View Evidence Information
For the signers, page view evidence is very simple. The process for signing online documents is the same for all signers. The only difference is that while you’re signing, you’ll be prompted for a checkmark with the text “I have read the current page“. Once you’ve checked the box, it won’t be accessible to you anymore. Continue through the document and Submit when you’re finished.
![]()
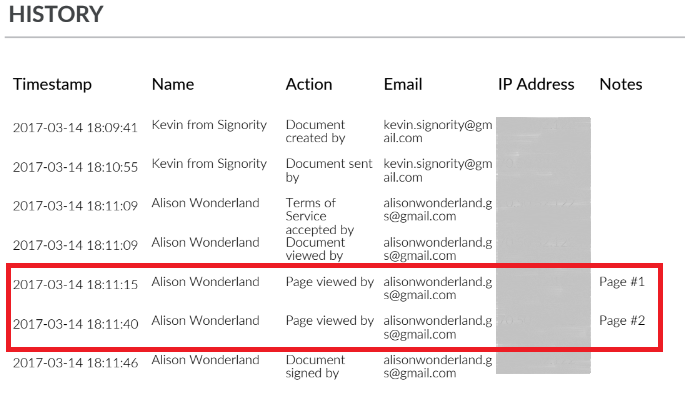
This information will then be captured in the document history. While you’re monitoring your document status and history, you’ll be able to see which pages they’ve read and reviewed. The information will also be shown in the audit trail in the finalized document.
That’s all there is to page view evidence. It’s a simple feature but can be very useful depending on your document!
Further Readings
The Anatomy of an Audit Trail
Setting Your Default Automatic Reminder and Notification Settings
Track and Monitor Document Status & Workflow