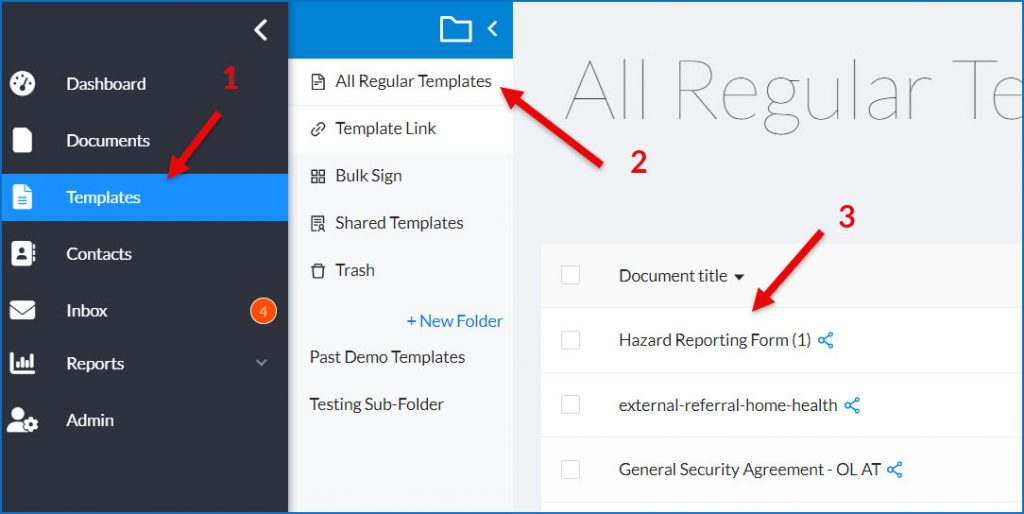
Available Plans: Premium, VIP, Standard, Custom Users: All Users
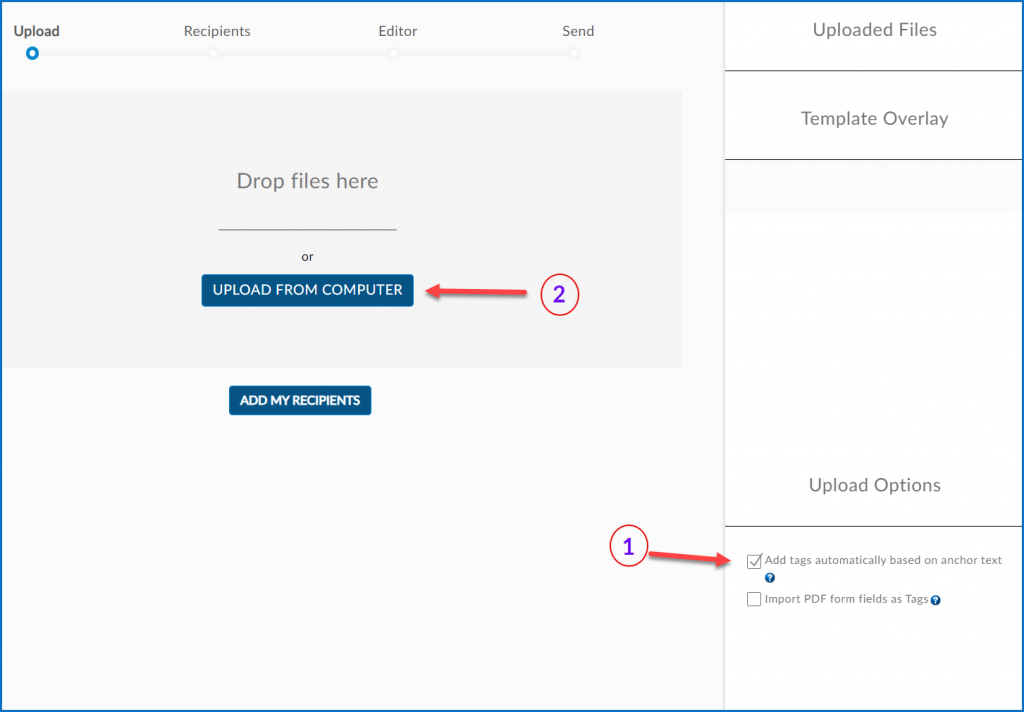
Did you know that you can turn your word documents into a Signority template before uploading it?
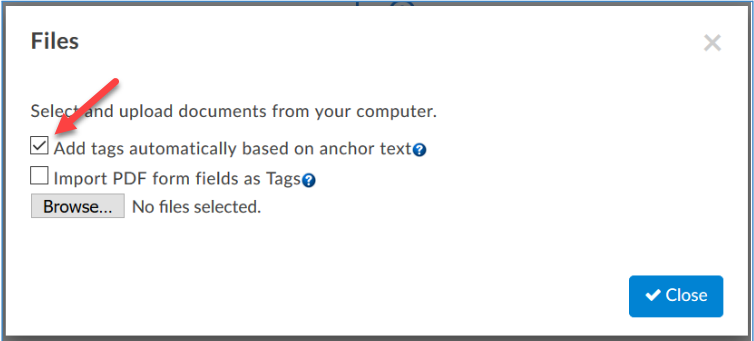
Using the Smart Tagging feature Anchor Text you can. Anchor text allows you to embed Signority tags directly into an offline document. This is done using a string of characters that tell Signority what kind of tag to place, in what position, and who to assign it to. And they are much simpler to use than it sounds.
Note: Anchor Text can also be used in API integrations with Signority. For more information about our API, you can check out our online API documentation.
What is Anchor Text?
Anchor Text is a string of characters that tells Signority where to place a tag, what kind of tag it should be, and who to assign the tag to. A basic anchor text string requires at least three parts:
- An opening and closing backslash
- The letter telling Signority which tag to place there
- A number that signifies which signer in the workflow the tag is assigned to.
For example, if we wanted to make a text tag and assign it to the first person in the workflow we would place \t1\ where we want the text tag to appear.
Here are the definitions of each component of this text string:
\ Tells Signority to start a tag here and opens the string.
t Make it a text tag
1 Assign it to the first signer in the workflow (use 2 to assign to the second signer, etc.)
\ Closes the anchor text tag string.
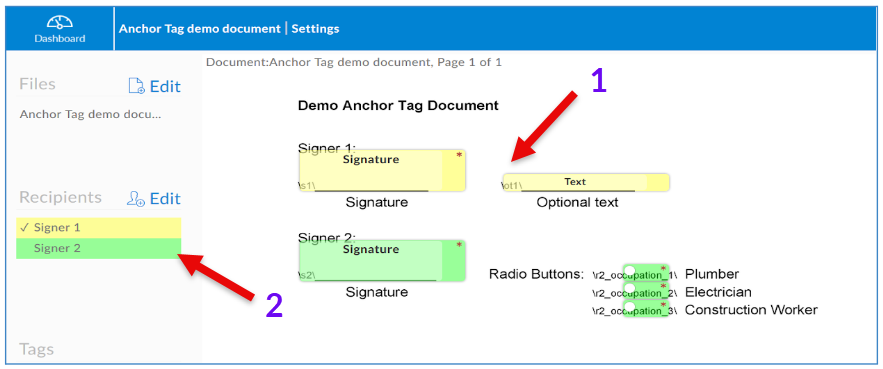
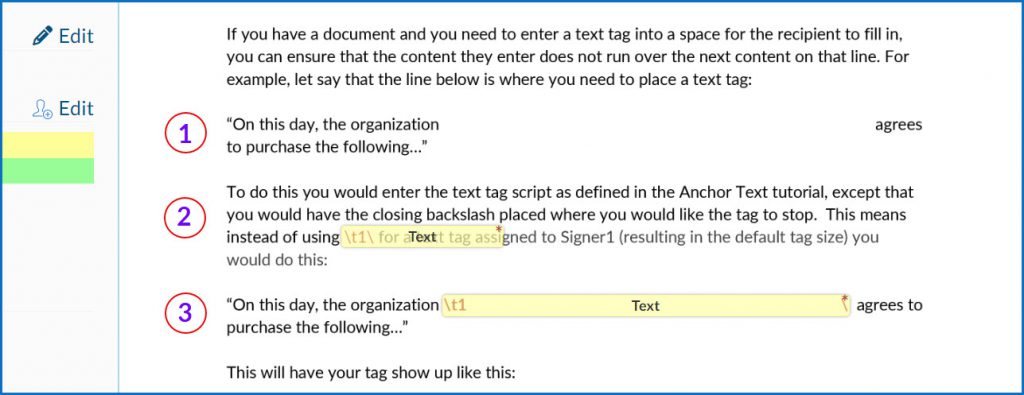
This image shows you a partial page of content with Anchor Text placed where we want the tag, In the sample below you can see:
- The anchor text string in the tag, note how the tag starts exactly where the backslash does.
- We left room for the default tag size and have the period for the sentence at the end of the tag, before having the content continue. This will take a little practice to get right.

Note: Once you have the anchor text string where you want it, you will want to change its font colour to white, this will ensure that it does not show in your final document.
Mandatory vs Optional Anchor Tags
When creating the document template you may want some tags to be mandatory and others to be optional. The anchor text string by default creates a mandatory tag. To make a tag optional you simply include a lowercase ‘o’ (not a zero) after the first backslash in the string.
The text tag assigned to the first signer in the workflow, as used above, is \t1\, if we wanted to make this tag optional it would simply look like this, \ot1\.
\ Tells Signority to start a tag here and opens the string.
o Sets the tag as optional for the signer
t Make it a text tag
1 Assign it to the first signer in the workflow (use 2 to assign to the second signer, etc.)
\ Closes the anchor text tag string.
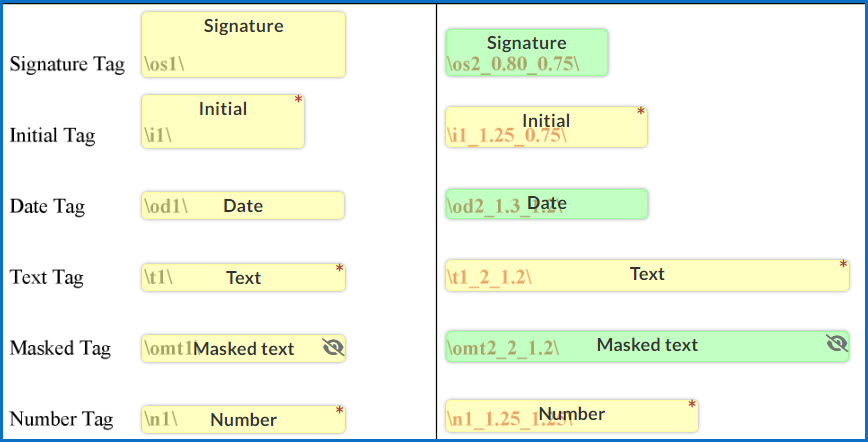
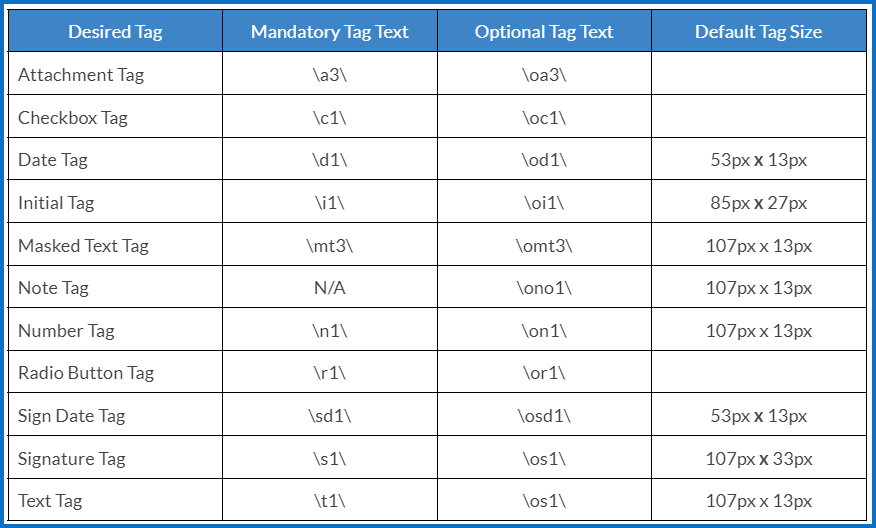
This table gives you the list of tags available for use with anchor text, the strings for both mandatory and optional tags, and the tags default size in pixels (width x height). Note: Only tags that can be resized have their default size listed.
Radio Buttons Options
Radio buttons are unique as a tag because you use them when giving your signer a series of options to choose from, and they are restricted to choosing only one of those options. Radio Buttons must be used in groups of two or more. Because radio buttons are used in groups of two or more it is most likely that you will want to label them in some way to confirm which option your signer chose.
For example, if you were using radio buttons to ask your signer to choose which one of three locations they would like to work, in Canada, the U.S., or Mexico. Here is how you would set up those three radio buttons; \r1_country_1\, \r_country_2\, \r1_country_3\.
Let’s break it down:
\ Opens the anchor text string
r Tells Signority the tag is a Radio Button
1 Assigns it to the first signer in the workflow
_country_ Is the name of the tag group, this tells Signority they are all part of the same group
1,2,3 The option chosen within the group of radio buttons (you may also use letters)
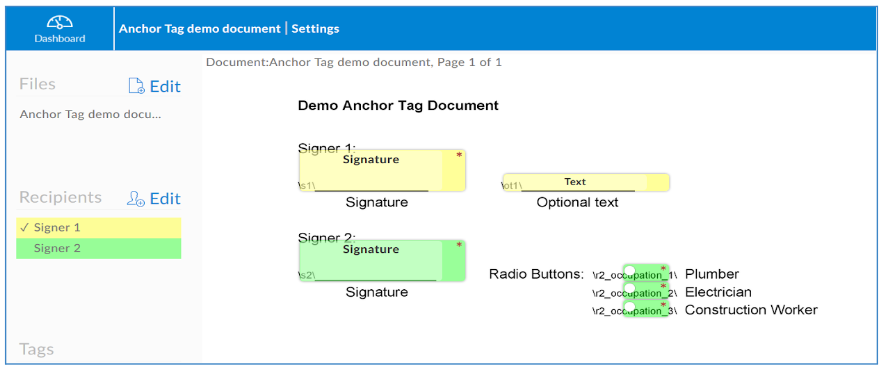
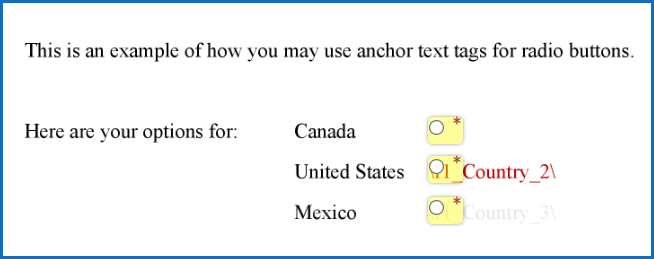
Below is an example of how you may set up a 3 option radio button group asking your signer to choose one of three countries.
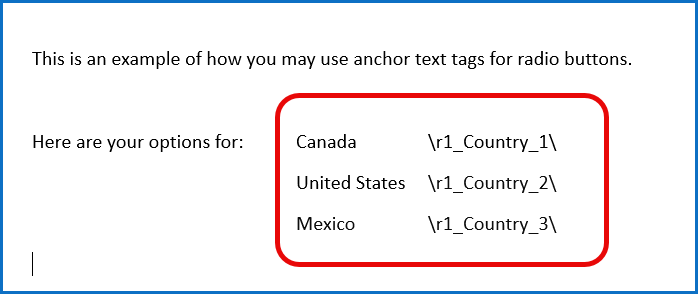
In the image below you can see that prior to uploading the document I changed the font colour to white on the first one so you can see how you want it to appear in your document. And I coloured the second option red to give you a sense of how much room a radio button will take up compared to the text string.
Next you may want to learn about:
- Sizing Anchor Tags
- Create a Template Using Anchor Tags
- Create a Document Using Anchor Tags