Anchor Text: Creating a New Document
Available Plans: Premium, VIP, Standard, Custom Users: All Users
Create a New Document with Anchor Text
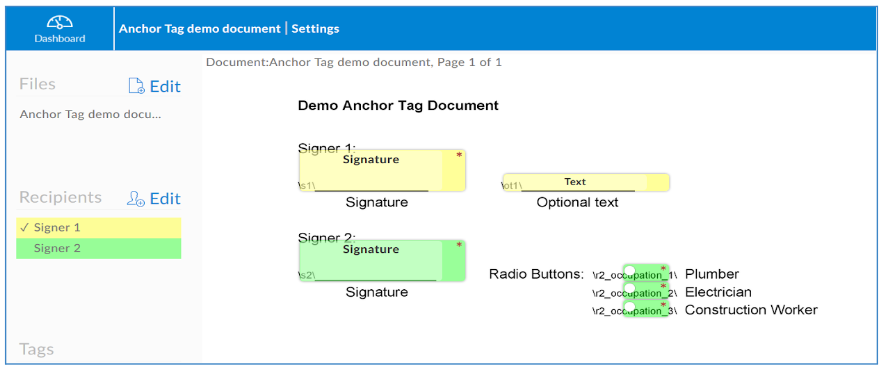
Now that we have the basics, here’s how to create a new document in Signority with anchor text. First, you will have to create a document in your desktop that has anchor text in them. In the demo document below, there are two recipients. For the sake of demonstration, we’ve made the anchor text black. Once the document is ready you will want to change the text colour to be white so that it can’t be seen.
Note: The first few times you create a new document or template with Anchor Text you will have to adjust the position of any surrounding text or content to accommodate the tag size. To learn the different ways you can resize a tag to fit your document read: Sizing Anchor Text Tags.
After you have created your document with the anchor text:
- Sign into Signority
- Click on the New button
- Select New Document.
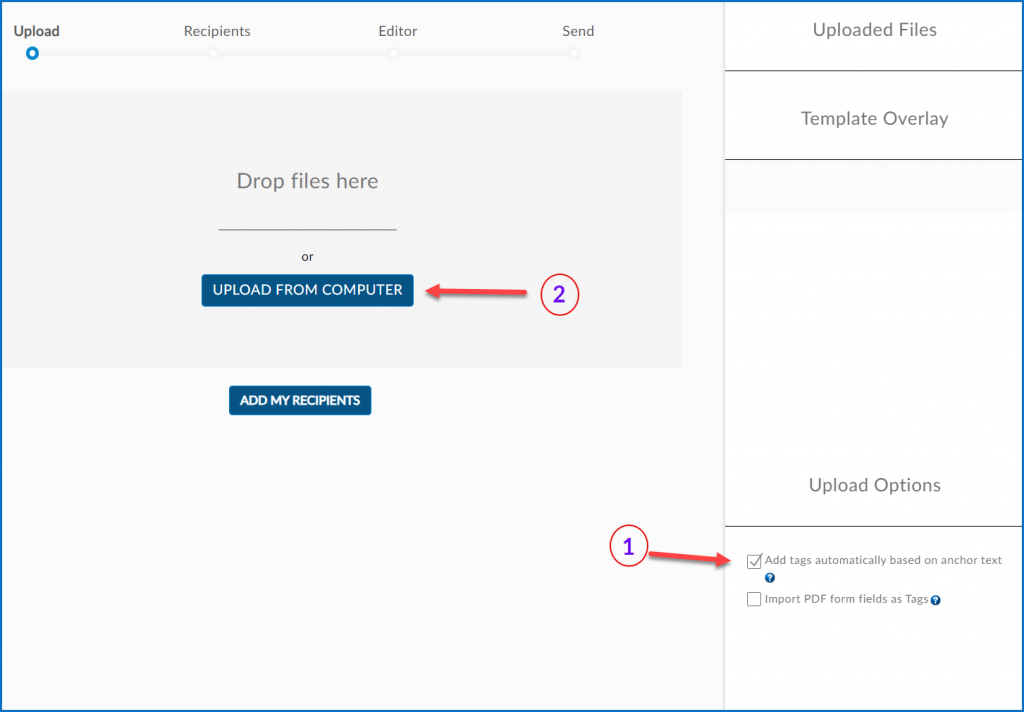
On the Document Upload page, in the order below:
- Under “Upload Options” check the box “Add tags automatically based on anchor text”
- Then upload the document(s) you have created with the anchor text.

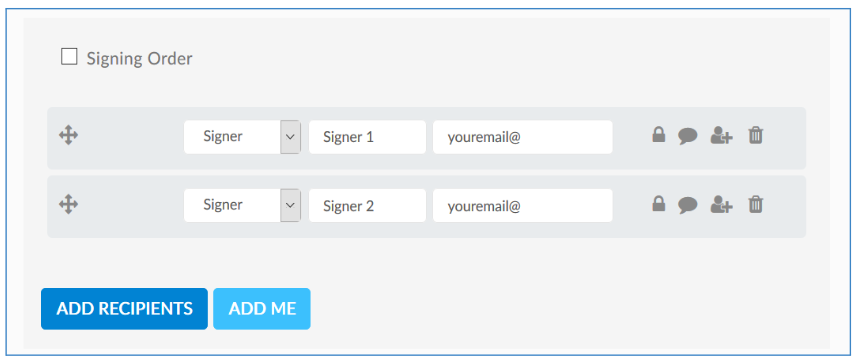
Once you have uploaded your documents, click “Add my recipients” or “Next” and add your recipients. Signority will automatically detect how many recipients need to sign the document based on the anchor text that you have inputted.

After adding your recipients, continue to the document editor by clicking “Next”. You should see Signority Tags placed on top of the areas where you inputted anchor text. You may resize or reposition the tags as you would normally do with any New Document, if required.

Double check to make sure everything is in the right place and the size you need. Then click send and wait for your document to get signed!
Anchor text can also be used in API integrations with Signority. For more information about our API, you can check out our online API documentation.
Next you may want to learn about:

