Checkbox Tag
Add a Checkbox Tag
- Create a document or template as usual, adding the files and recipients.
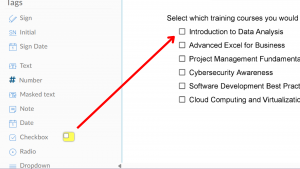
- In the document editor, under Tags on the left panel, add the Checkbox tag to your document.

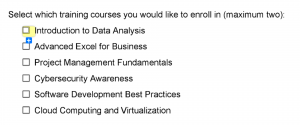
- Click the “+” symbol at the bottom of a checkbox to add additional checkboxes to the group.

- Click and drag the individual checkboxes to your desired position.
Tip: For precise alignment, you can select the entire group and use the alignment tool on the right panel.
Validate a Checkbox Group
In Signority, you can validate checkbox groups to enforce how many checkboxes a recipient must or can select by using the “Group Validation” setting.
- Select a checkbox tag that is a part of a checkbox group.
- Click on the gear icon to open the checkbox group settings.
- Under “Group Validation, ” select from the following options:
- Select at least
- Select at most
- Select exactly
- Set the value of checkboxes they can select.
Example: If you require your client to select a maximum of (2) training sessions, you set validation to “Select at most” and enter a value of 2.


