Setting Up Documents with Witness Signers
When you’re adding a recipient, you have the option to also add a witness requirement to their signature. Witness signers can be assigned their own tags, but are associated and linked to a particular recipient – they’ll have to sign and access the document in person, and at the same time as the signer.
To get started, create a document as you normally would. If you would like more information on how to create a document, visit this page here!
Steps for Creating a Document for Witness Signers
Start a New Document using the +New button in the Dashboard.
- Upload the document needing a witness signer
- Click Add Recipients until you’ve reached the required number of signers and enter their name and email.
- There are four icons to the right of a recipient, click the third (a person with a + symbol) icon next to the signer that needs a witness.

- The witness signer’s name and email are unknown to the sender, so you must set up an authentication method by clicking on the Lock icon and select the authentication method you like: email, SMS, and/or ID. This allows you to validate their identity. Click ‘Next’ or ‘Design my documents’ when you’re done. Note that for ID authentication, you must specify what kind of ID information you want from the witness.
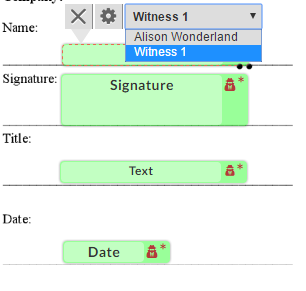
- A witness is now added as a recipient, on the Editor page, you can assign tags for witness signers. Tags that are associated with witnesses will have an additional icon at the top right of the tag.

The rest of the process is the same as any other document. Add and assign all the necessary tags to the right signers and then Send it off to collect your signatures.
Are you a witness signer or just want to see what it looks like for the signers? Check out our page on signing as a witness here!
Further Reading
Validate Electronic Signatures with Email & SMS Authentication
Setup Documents for In-Person Signing
Benefits of Digital Signatures

