Lock a Tag and Make it Read Only
Available With: All Team Plans
If you need to lock a tag and make the content ‘read only’ you can do that in a few simple steps.
- Place the tag where you need it.
- Click on the tag and then select the gear icon

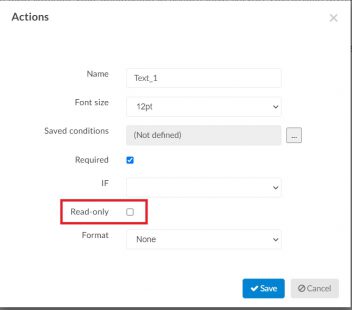
- In the window that pops up you will see the Read Only option as below. Check the box to lock the tag and its content. Leave it unchecked to allow the signer to modify or update the content.

- If you lock the tags you will see a lock icon appear in the tag like in the image below.

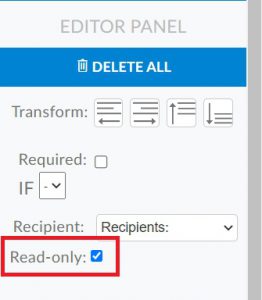
- And if you select multiple tags you can lock, or unlock, them all at once using the options that appear in the right sidebar.

