Signature Tag: Advanced Features
This article will review the different features that are available to the Signature Tag.
The Signature is used to capture the signature of your recipients on a document. A signature may be submitted by the recipient by uploading and image, typing a signature, or drawing a signature using a finger or stylus.
The tag, seen in the image below, when clicked on will have a menu will three icons appear on top and three dots on the bottom right of the tag.
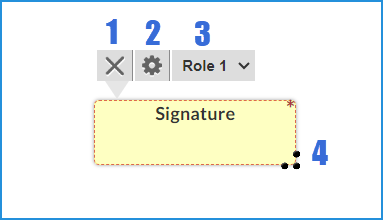 1. X: will delete the tag
2. Gear: will open the advanced features window
3. Recipient Drop Down Menu: Allows you to change the recipient the tag is assigned to
4. Three Dots: Click your mouse on these dots, hold, and drag your mouse to resize the tag.
In the Advanced Features modal window that pops up you will find the following options:
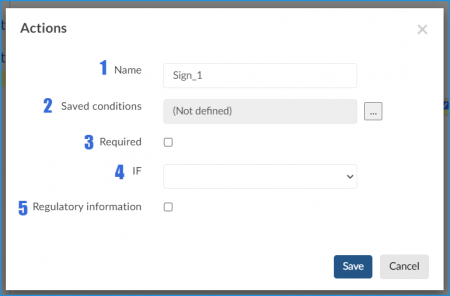
- Name: Give the tag a name to identify it, this is helpful if you export the document data.
- Saved Conditions: If applicable this allows you to set conditions on when, how, or if the tag is used. Currently there is no condition that uses the Signature tag.
- Required: Check this box to make the tag Required for mandatory signing.
- IF: This dropdown menu will list all the checkboxes in the document and allow you to make the Signature Tag mandatory, or optional, depending on your selection.
- Regulatory Information: Checking this box will apply a timestamp and GUID information appear underneath the signature.